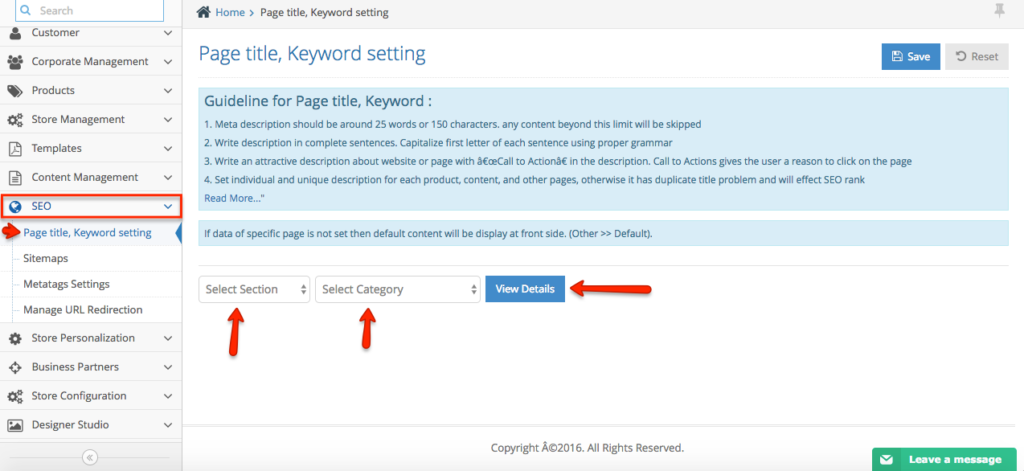
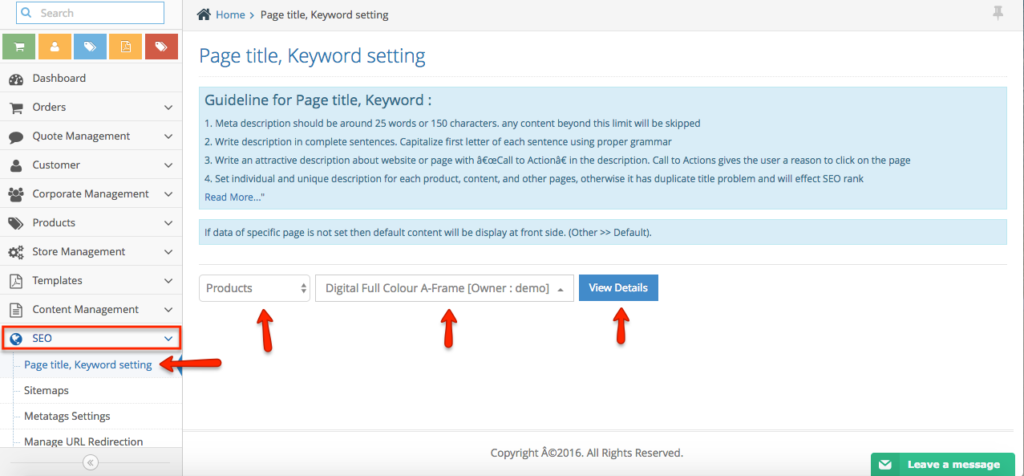
Step 1. From the home page, navigate to SEO section. If you’re looking to optimize your page, click the Page Title, Keyword setting option.
SEO
Interface overview
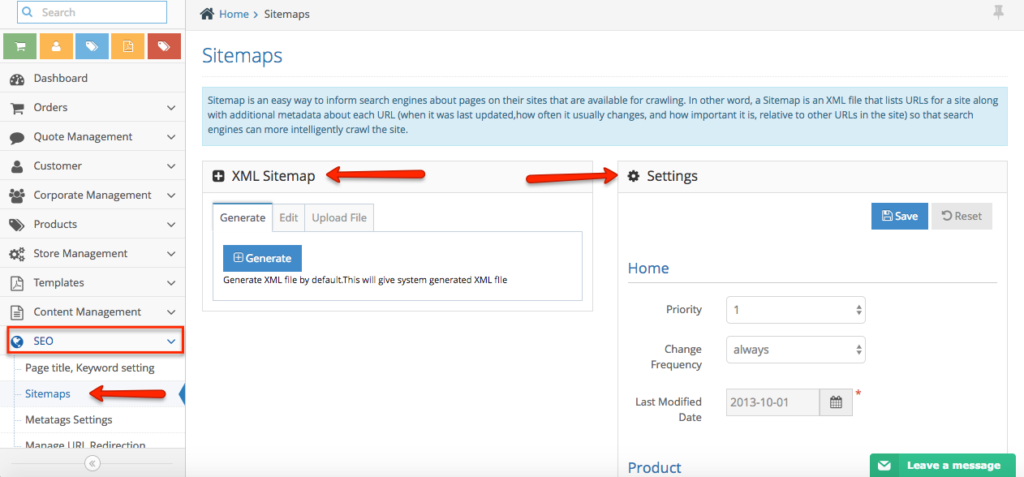
Step 2. If you wanted to generate your sitemap, you can do it SEO section > Sitemaps. From here, you can generate an XML Sitemap and update the settings.
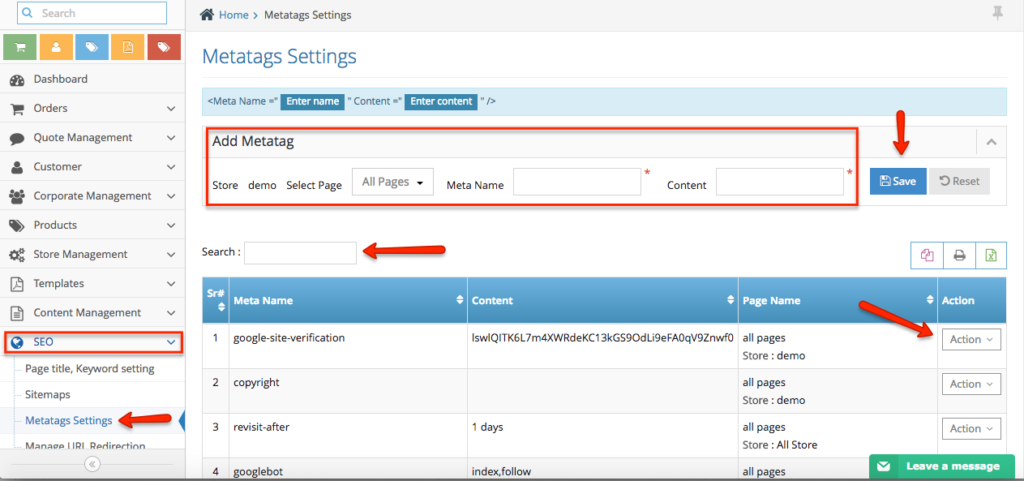
Step 3. To verify your website through google, you can do it using Metatags Settings.
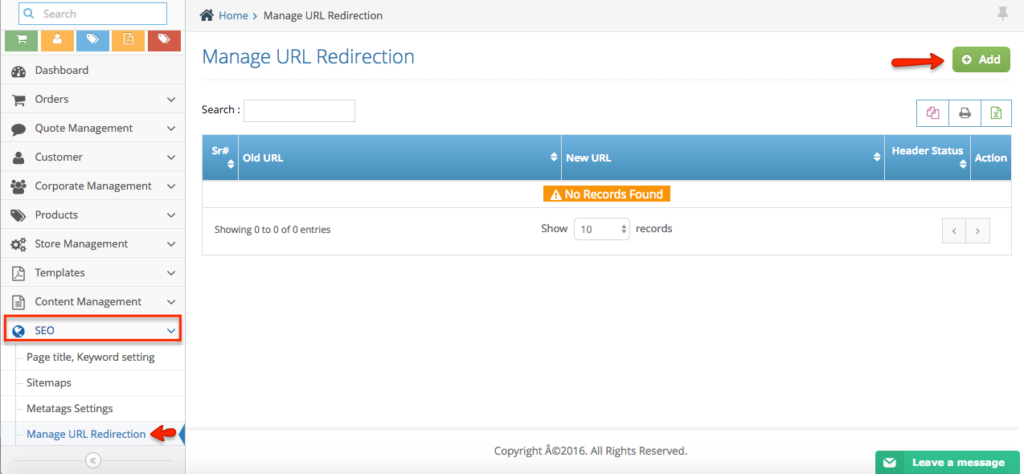
Step 4. To redirect your website to any other website, select Manage URL Redirection option.
Optimise your page
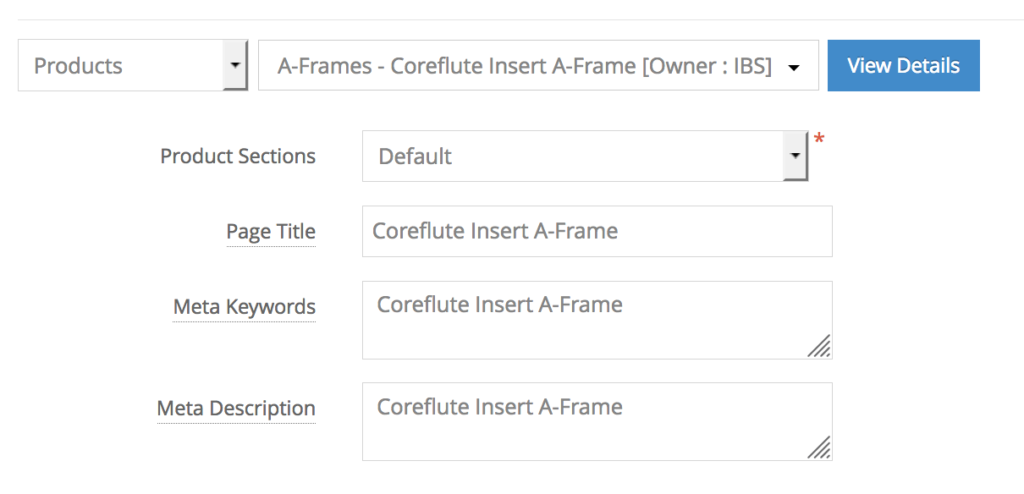
Step 1. From the home page, navigate to SEO section, then click Page Title, Keyword setting.
Step 2. Select the corresponding Section and the Product from the dropdown list.
Step 3. Click View Details to see the Default Metatags settings.
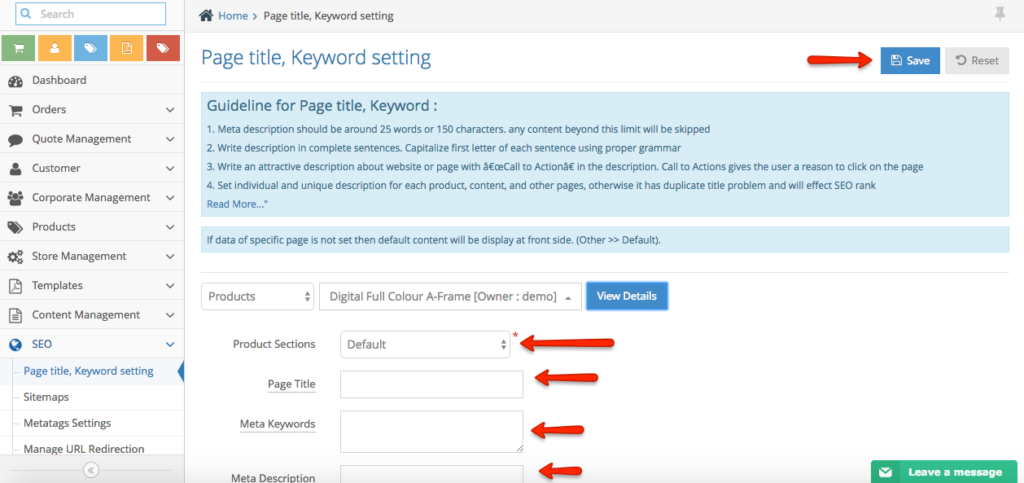
Step 4. In this page, you can change the Page title, Keywords, and Description. Click Save button once done.
How to generate your website sitemap
Summary : it is really important for you to update your sitemap to the latest version for Google to index your updated site. Please follow the step by step process below how to update it.
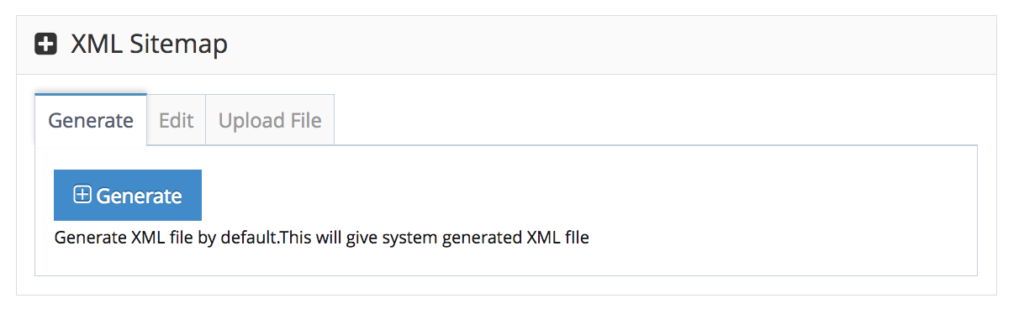
Step 1. Login to your website admin > navigate to SEO > Sitemaps on your left hand side navigation bar
Step 2. You will see 3 tabs on the Sitemaps page (Generate, Edit & Upload), Click ‘Generate’ button in order for the system to generate the updated sitemap on your site.
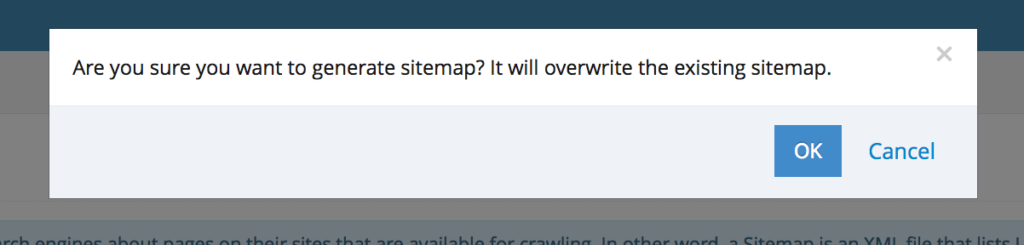
 Step 3. You will see a pop up window to confirm whether you’d like to proceed with the activity as it will overwrite the existing sitemap. Click ‘OK’ to continue
Step 4. Once it’s completed you will see the green pop up box to confirmed that the sitemap has been fully updated.

Verified your website
Step 1. Before verifying your website to google you need to add your website to google console first. Click here to add your site for verfication
(https://www.google.com/webmasters/#?modal_active=none_)
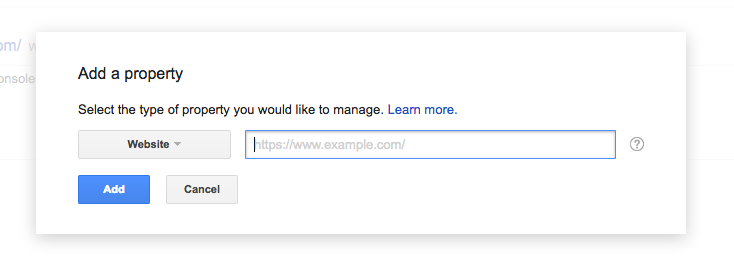
Step 2. Once you have signed in, you can click the ‘add property’ red button on the right

Step 3. Add your website URL
Step 4. On the verification method page, you need to select ‘alternate methods’ tab, and choose the ‘HTML tag’.
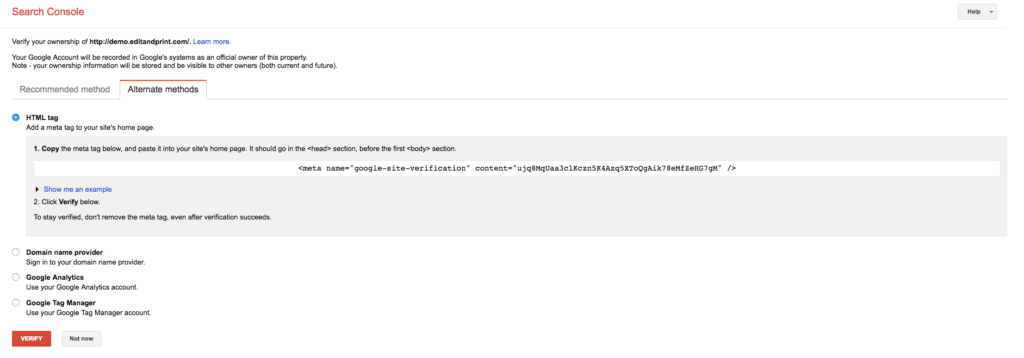
Step 5. Copy the meta name to your note.
Step 6. Login to your admin of your website and navigate to the left hand side navigation bar SEO > Metatags Settings
Step 7. Click the ‘edit’ button on the ‘Google Site Verification’

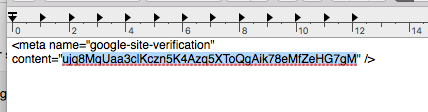
Step 8. Scroll to the top to the ‘edit metatag’ box and paste the content of the meta name you’ve copied from Google Console
note: just copy the meta name to the correct box.

Step 9. Click save to save the changes.
Step 10. Back to Google Console and click ‘verify’ button at the bottom to verified your site.
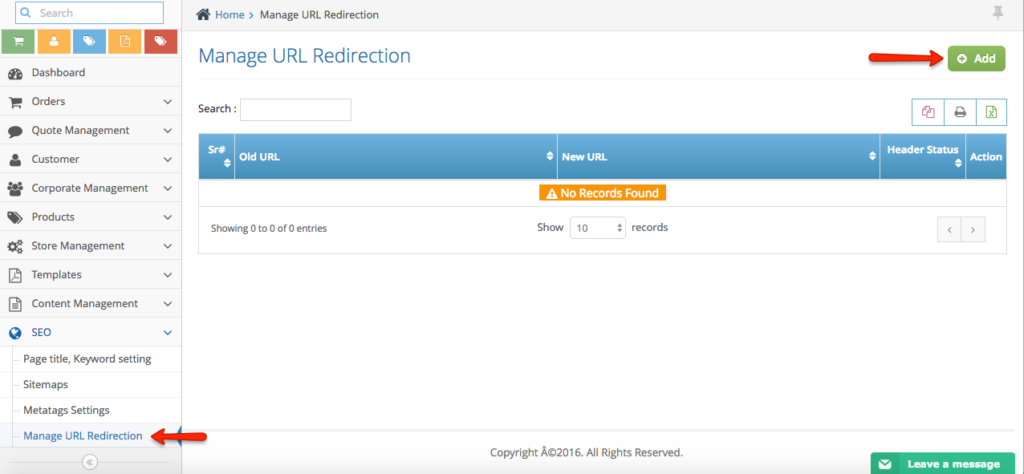
Re-direct old URL
Step 1. From the home page, navigate to SEO section, then click Manage ULR Redirection.
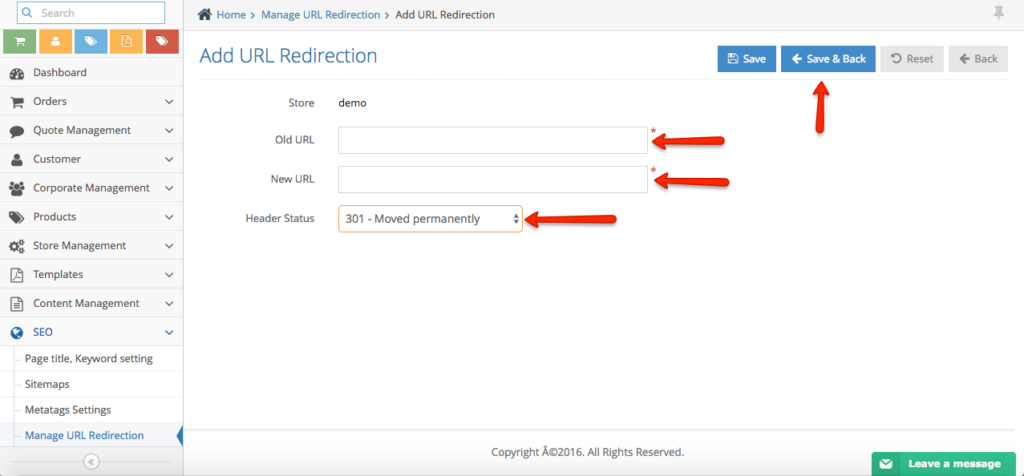
Step 2. Click Add button.
Step 3. Enter the Old URL, the New URL which you want to redirect a specific page then select the Header Status.
Step 4. Click Save & Back button once done.
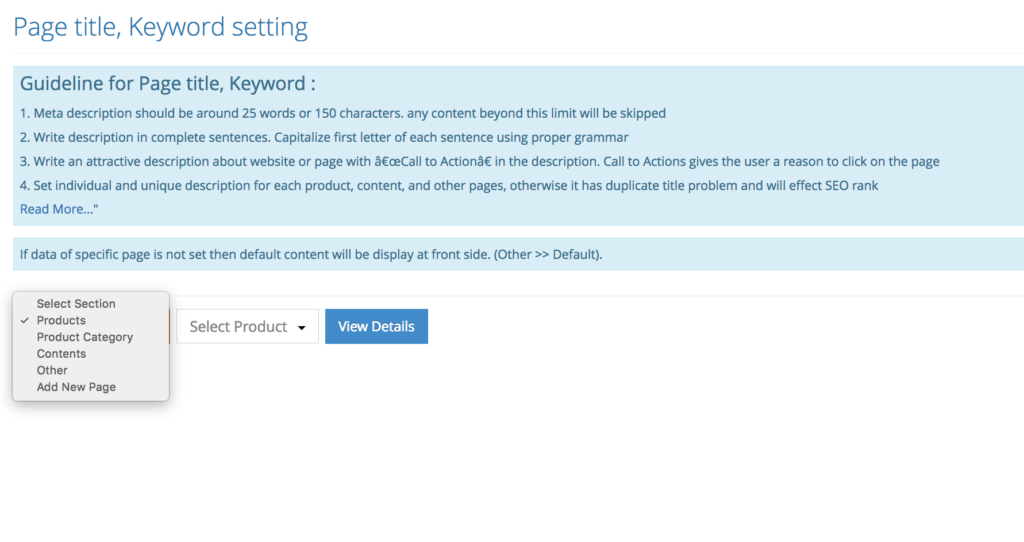
How to Manage Metatags
Step 1. Login to your Admin > Navigate to your left hand side navigation toolbar > SEO > Page Title Keyword Settings
Step 2. You can filter out which area you’d like to manage / optimise
Product: metatags keyword for each of your products on your website (i.e. 420 gsm uncoated, 310gsm matt one side)
Product Category: metatags keyword for each of your product category on your website (i.e. business cards, letterhead)
Content: metatags keyword for each of your website content on your website (i.e. About us, Artwork Guidelines)
Other: metatags keyword for fixed content on your website (i.e. index/homepage, shopping cart)
Add New Page: metatags keyword for new page you have created on your website.
Step 3. Click Submit to view the metatags and you will see below:
Product Section: optimise the keyword for different section / process on the product such as (upload, browse design, quote)
Page Title: optimise / manage the title of the products where it will display on the browsers tab (important)
Meta Keyword: optimise the keyword of the products / content (won’t be displaying in your frontend)
Meta Description: optimise the description of the products / content (won’t be displaying in your frontend)
Note: it is important that the meta tags to be relevant to the products or the content, no duplication on your website (different on each products / content)
Step 4. Click Save to save your changes