Facebook Plugin
Today we are going to show you how to setup a facebook plugin into your website.
Social plugins are really strong tools to advertise your business, and it is not difficult to
setup on your website.
By following these steps below, you will set up your Facebook plugin quickly and easily.
So, lets get started!
1. Create a Facebook account.
2. Get your Facebok APP ID and APP Secret
(i) click the Developer link on the footer

(ii) click the Apps button in the header banner
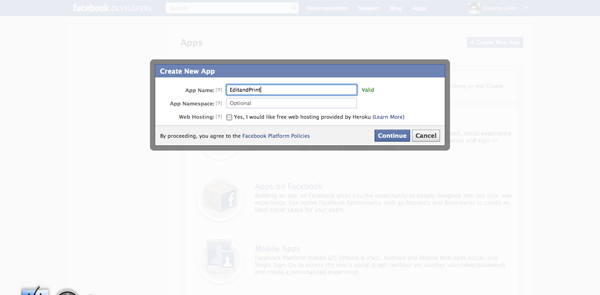
(iii) Create a new app for your website
(iv) Fill out your App Name and hit Continue, in this case it is for EditandPrint
(v) In this page you will get your App ID and App Secret. Copy (ctrl + c) both the App ID and App Secret.
and Fill out your App Domain and Website with Facebook Login, Then Save Changes.
3. Set up your Social Plugin in your website admin
go to Shop Configuration > Shop Management > Action > hgh side effects; Social Plugin Configuration
This is the page where you paste the APP ID and the APP Secret you generated in Facebook.
Also, in this page you can enable & manage your plugin look (“like button”, watermark, text colour, etc..)
4. What your shop front looks like after you set up your Facebook plugin
At Login : users can create an account using their Facebook details.
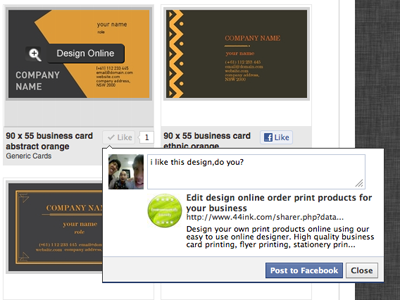
at the product page – they can ![]() a design and post it to their facebook wall
a design and post it to their facebook wall
on their facebook page it will appear like this
or they can share a design with their friends and ask for comment . Here is what it looks like on facebook
Also you will see a comment box on your product page
Customers can post their comments and if they wish can also post to facebook
Social media promotes your site through online conversations by users.
The more people are talking about your site the more visitors you will generate.
regards,
Support Team EditandPrint


