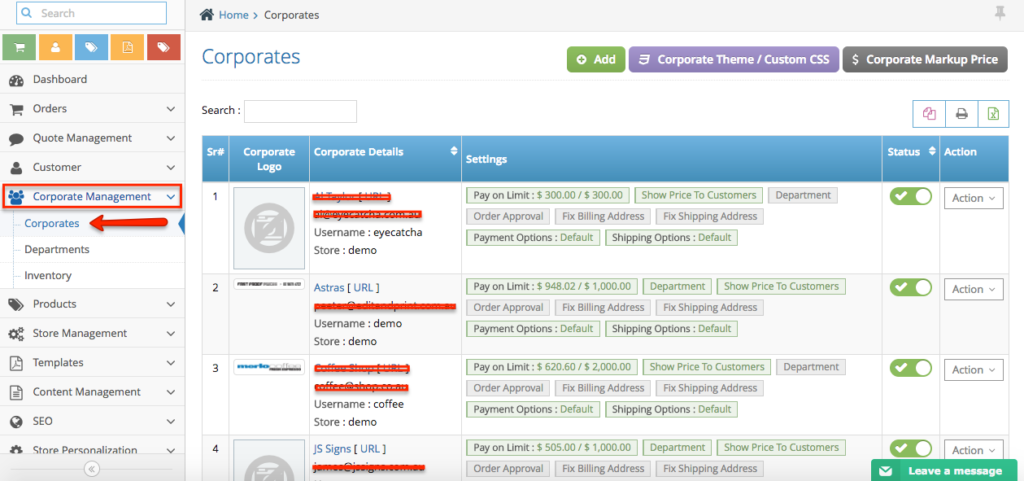
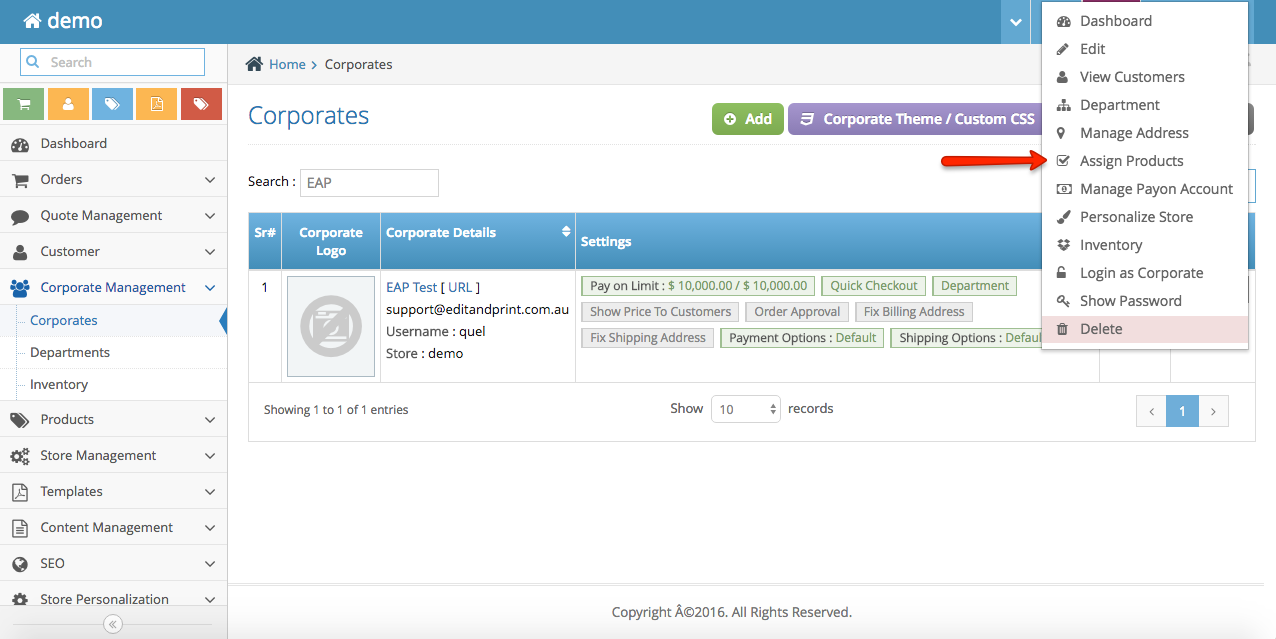
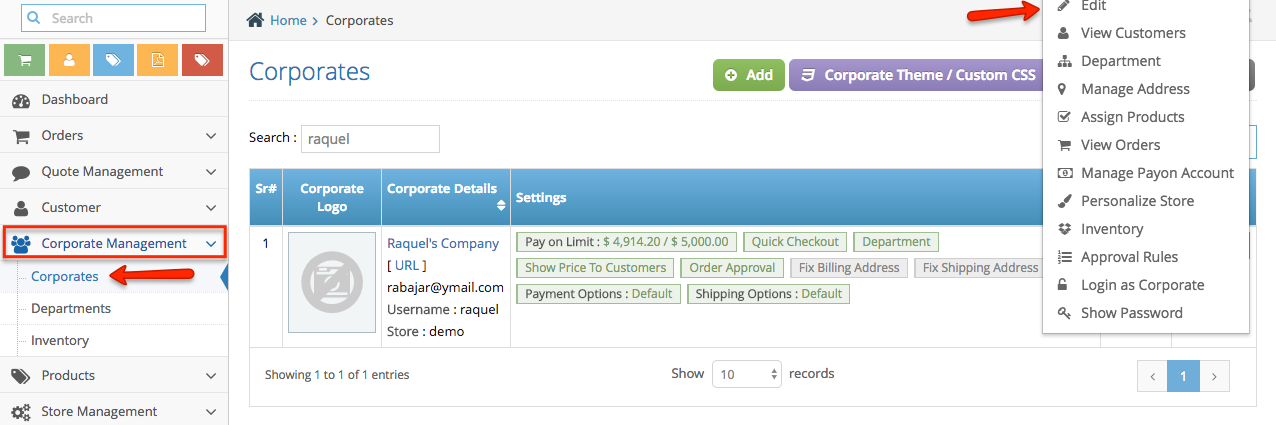
Step 1. From the home page, navigate to Corporate Management section, then click Corporates. This page will show the list of corporate accounts you have created. It shows the company name, account holder’s name, email address, if payon account is active and their credit limit, the department and the affiliate store.
Corporate Management
- Corporate Management
- Add a new corporate - adding corporate details
- Add a new corporate - adding corporate user
- Add a new corporate - special login personalisation
- Add a new corporate - Assigning products
- Managing corporate price
- Create a department
- Adding Access Roles
- Corporate Admin Interface
- How to manage corporate customer’s printing order inventory
- Unique contents for your corporate
Corporate Management
Step 2. You can set the status to Active or Inactive under Status column.
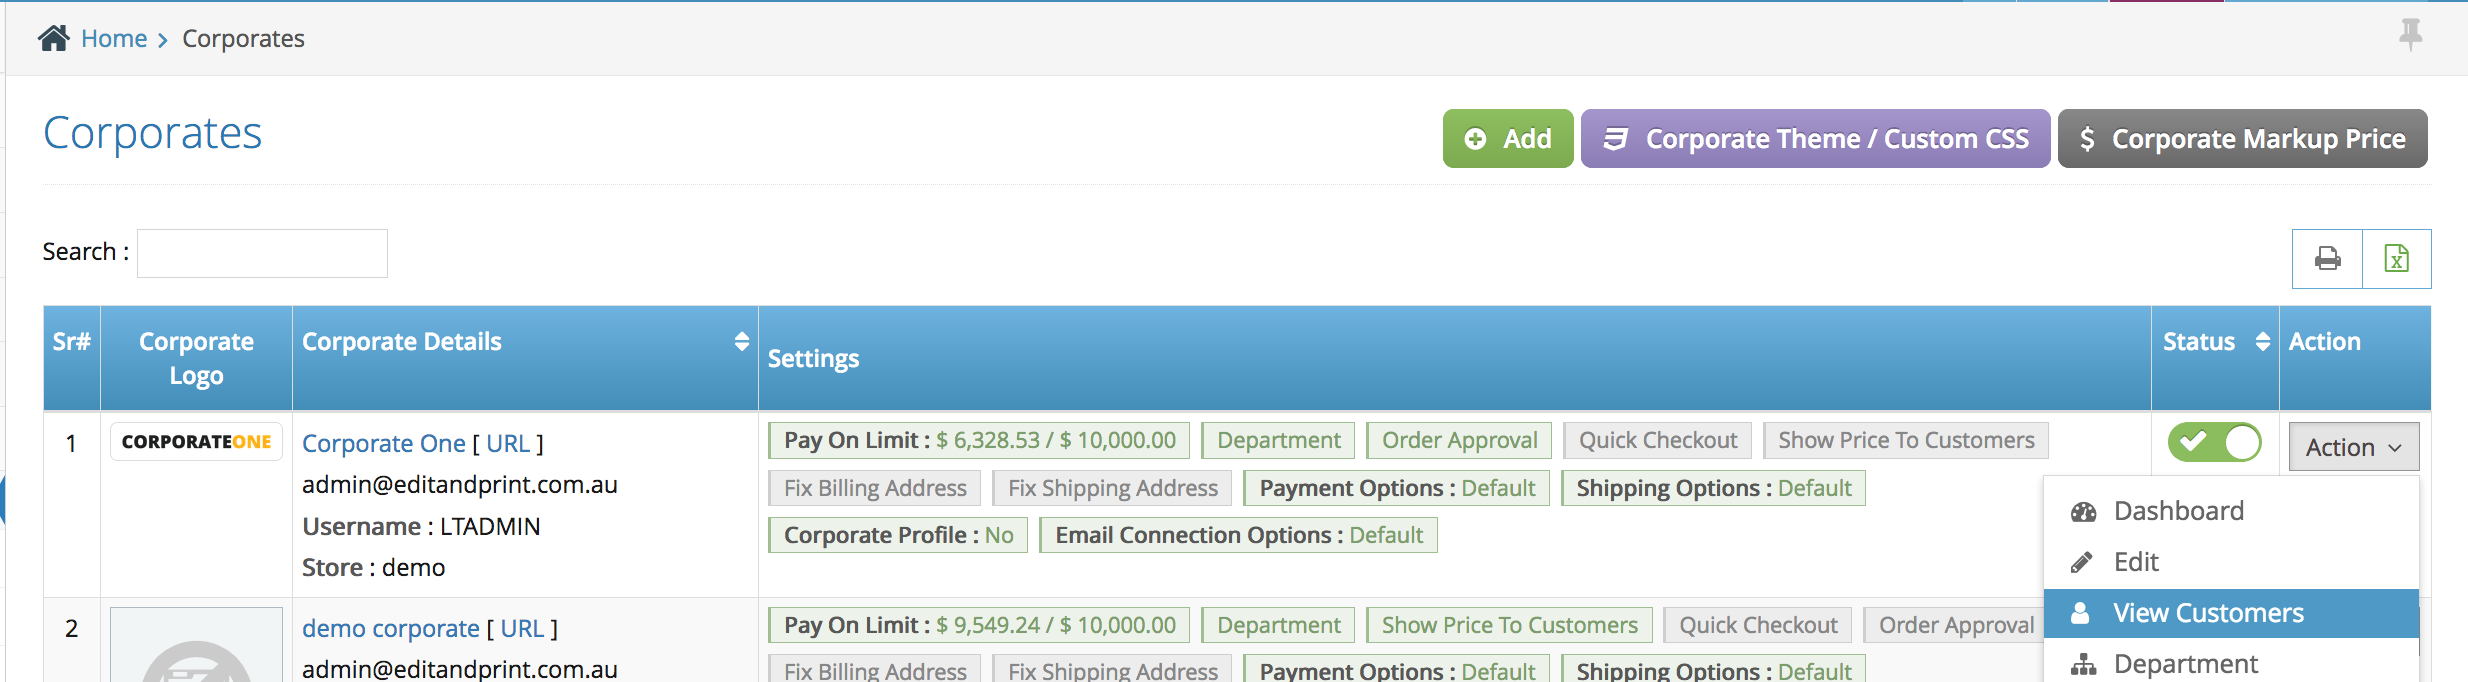
Step 3. The Action button in line with the account provides several options such as Dashboard, Edit, View Customer, Manage Address, you can also jump to Login Page Personalization, Theme/Setting Configuration, Assign Products, Login as Corporate, etc.
Add a new corporate - adding corporate details
Step 1. From the home page, navigate to Corporate Management section >> Click Corporates >> Click Add button.

Step 2. Fill out the form:
Corporate Details – Basically, this is the corporate information like name, phone, email, corporate name, access.
Settings – This are different settings you can allow/restrict for the corporate customer.
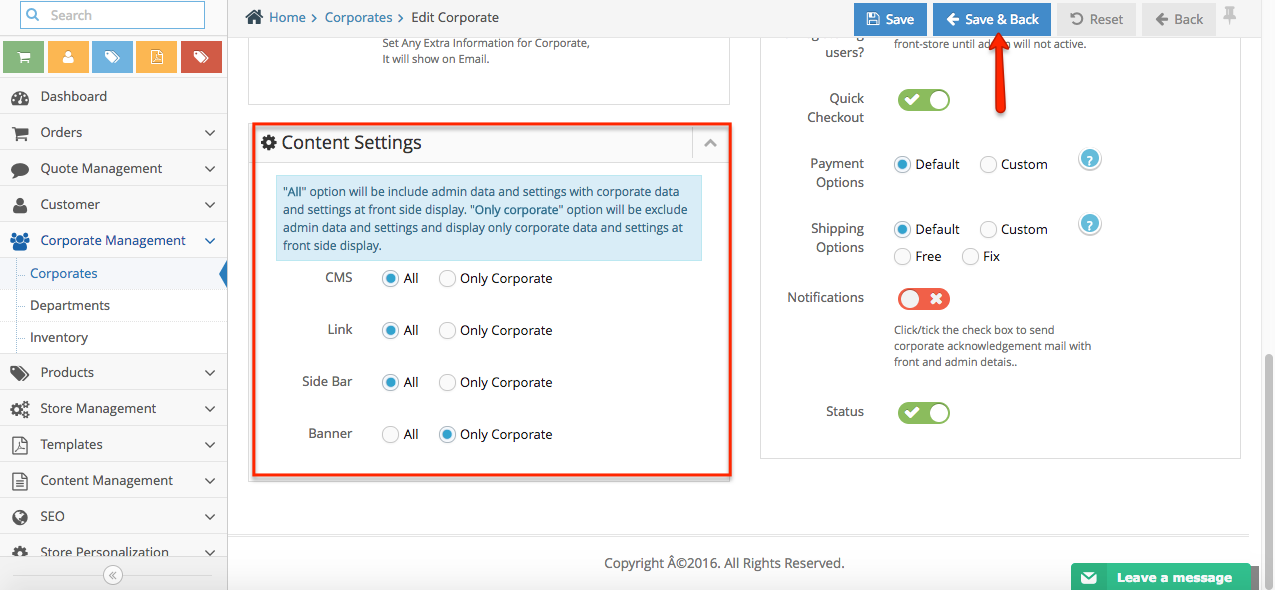
Content Settings – This applies to CMS, Link, Side Bar, Banner.
“All” option will be include admin data and settings with corporate data and settings at front side display. “Only corporate” option will be exclude admin data and settings and display only corporate data and settings at front side display.
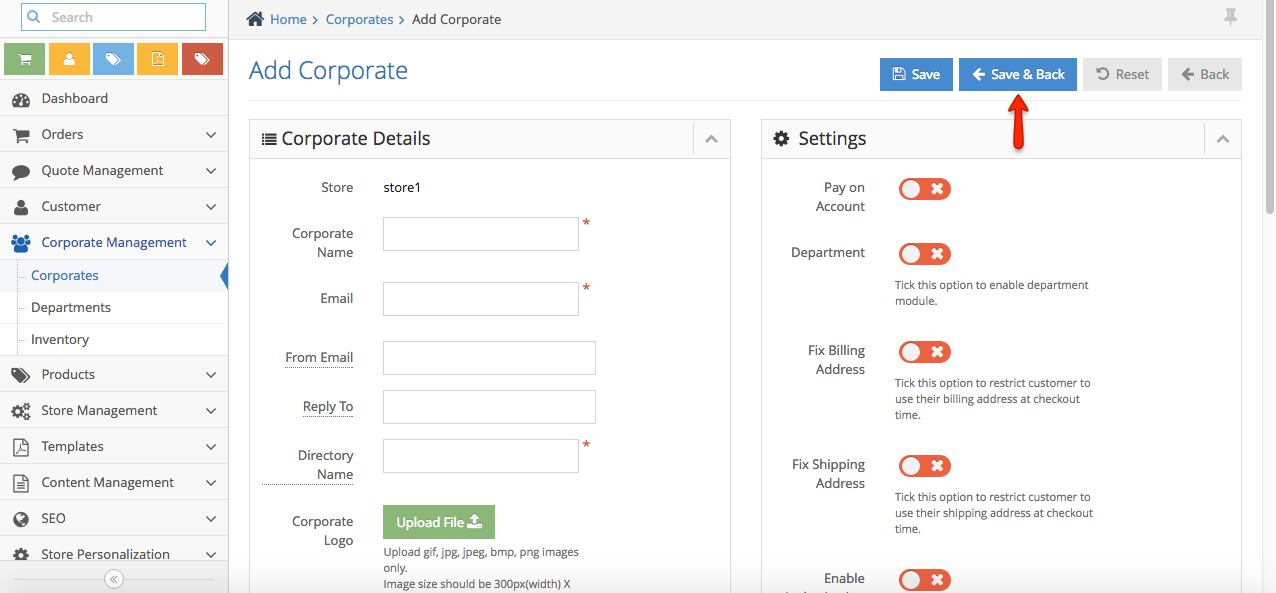
Step 3. Once done, click Save & Back button to apply the changes and to go back to the main Corporates page.
New Corporate User
Step 1. Login to your Admin and navigate to the left-hand side navigation bar Corporate Management > Corporates
Step 2. Select the Corporate > Action > View Customers
Step 3. Click ‘Add’ Button to add single user or Click ‘Import’ to import multiple users at once.
a1. Add single user – once you have clicked the ‘Add’ button, next is to fill out the details information (user details and address).
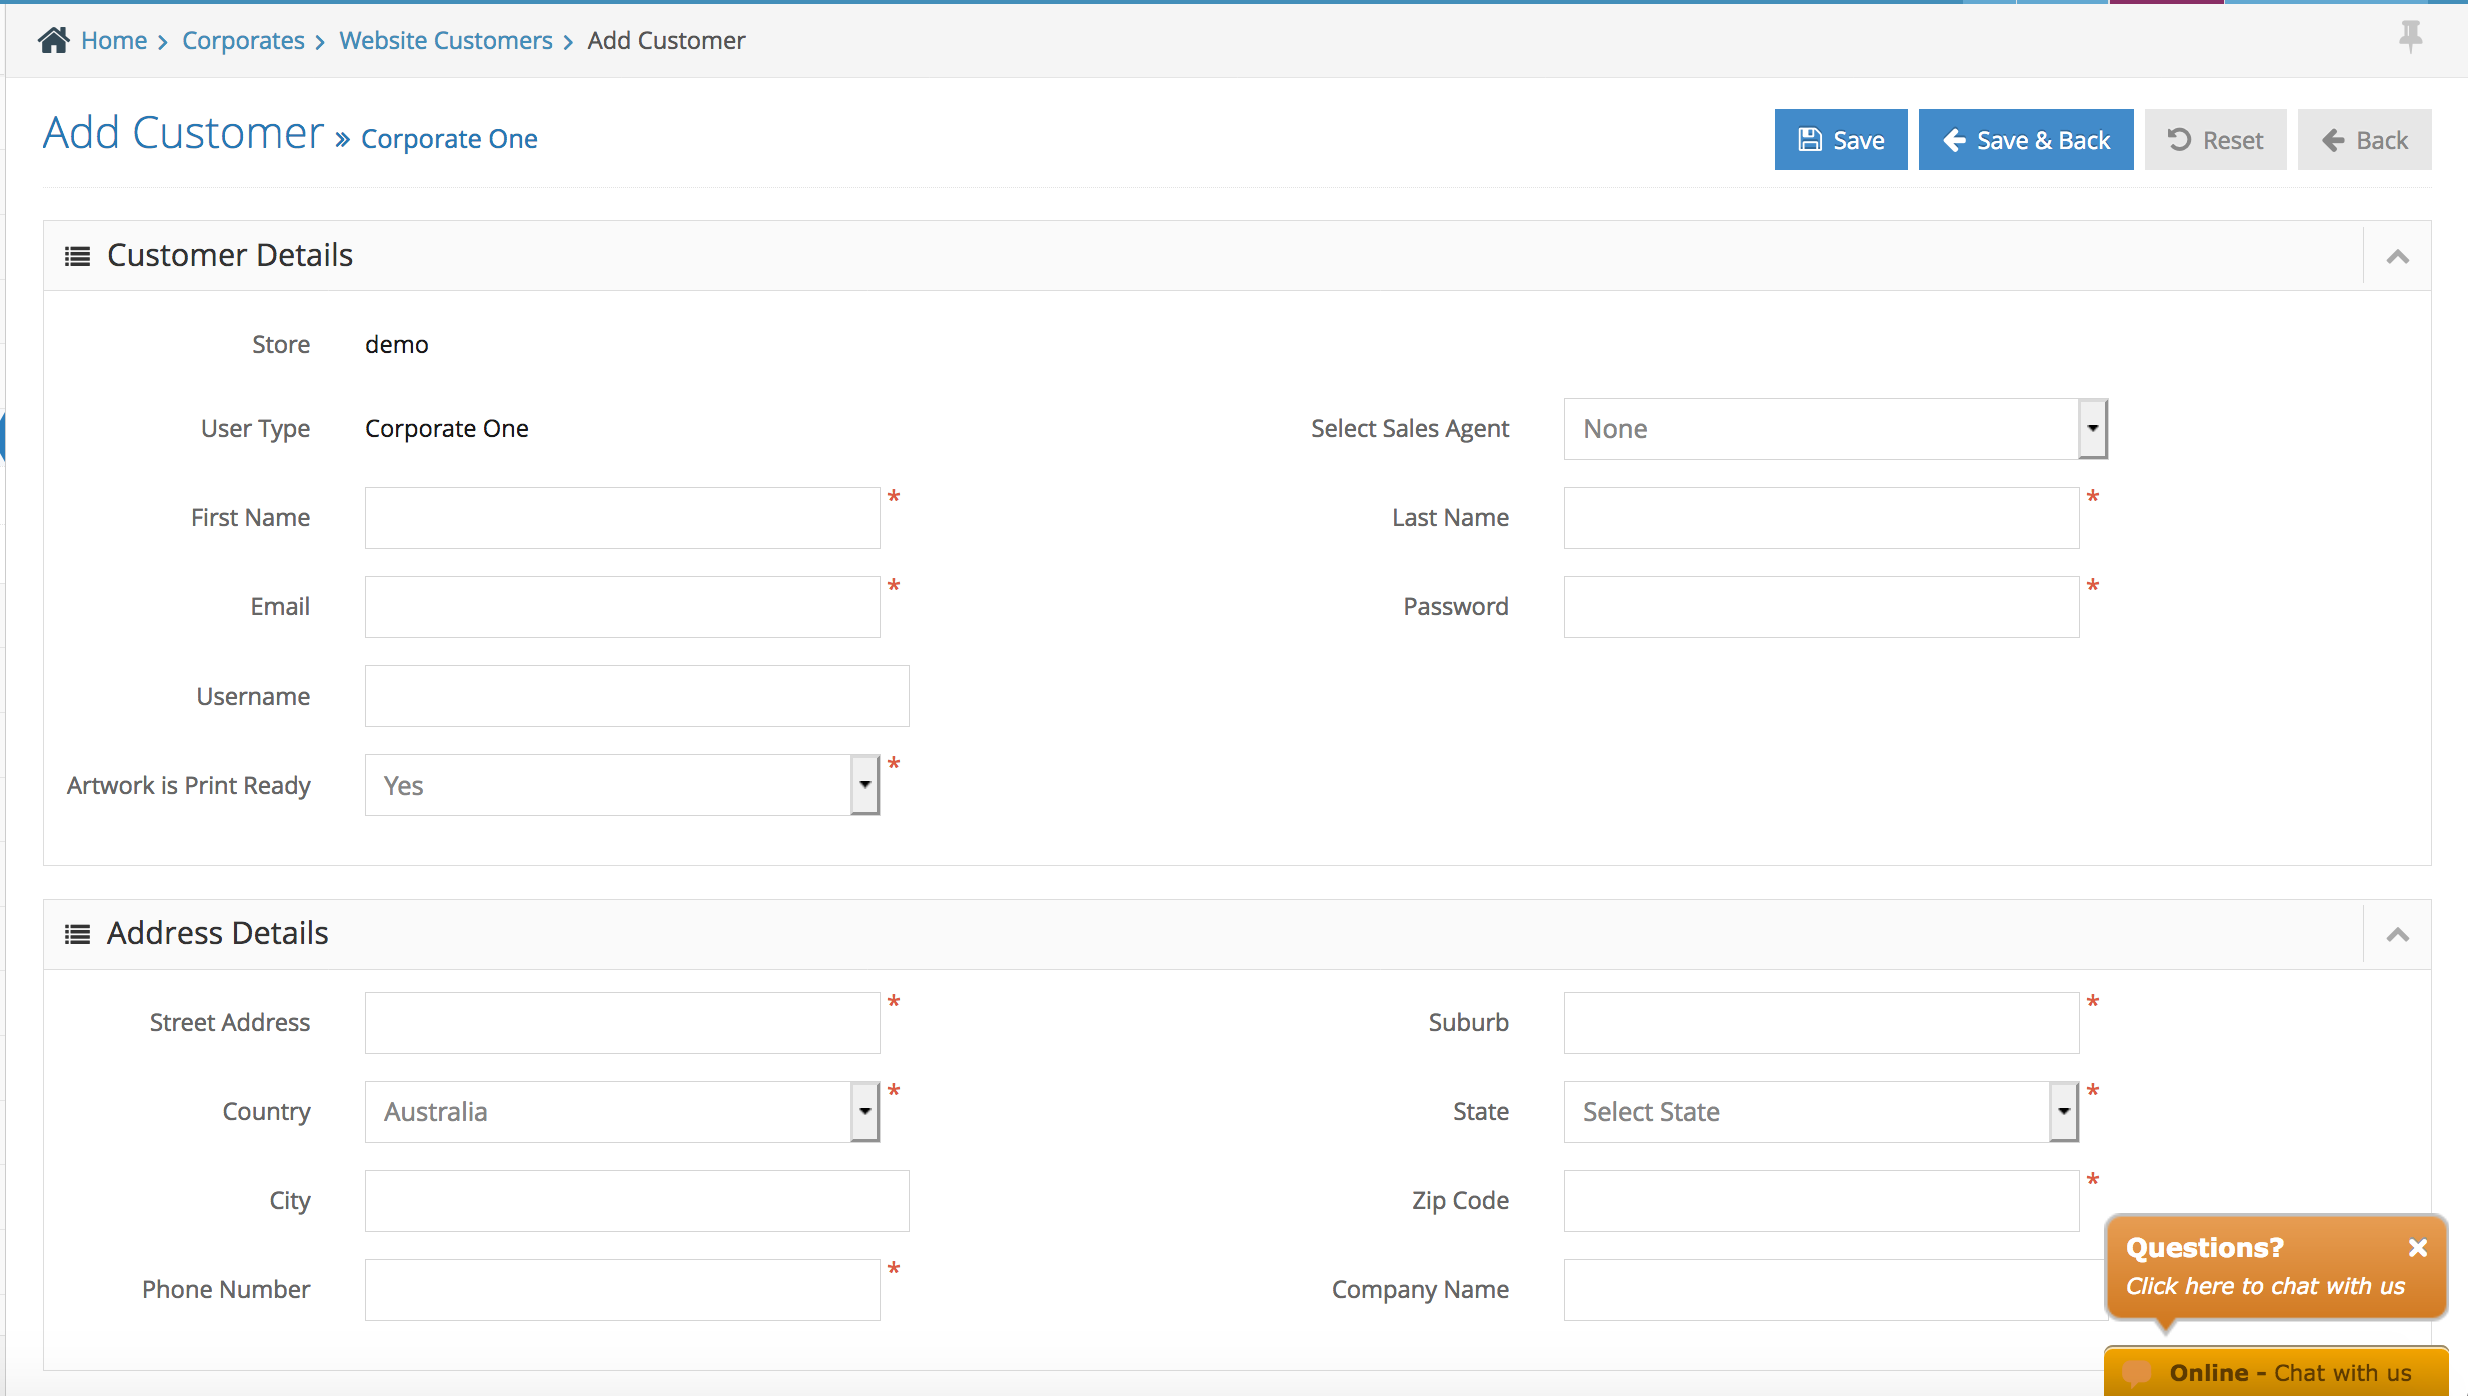
a2. click save to save your corporate user.
b1. Import multiple users : once you have clicked the ‘import’ button > download the sample file
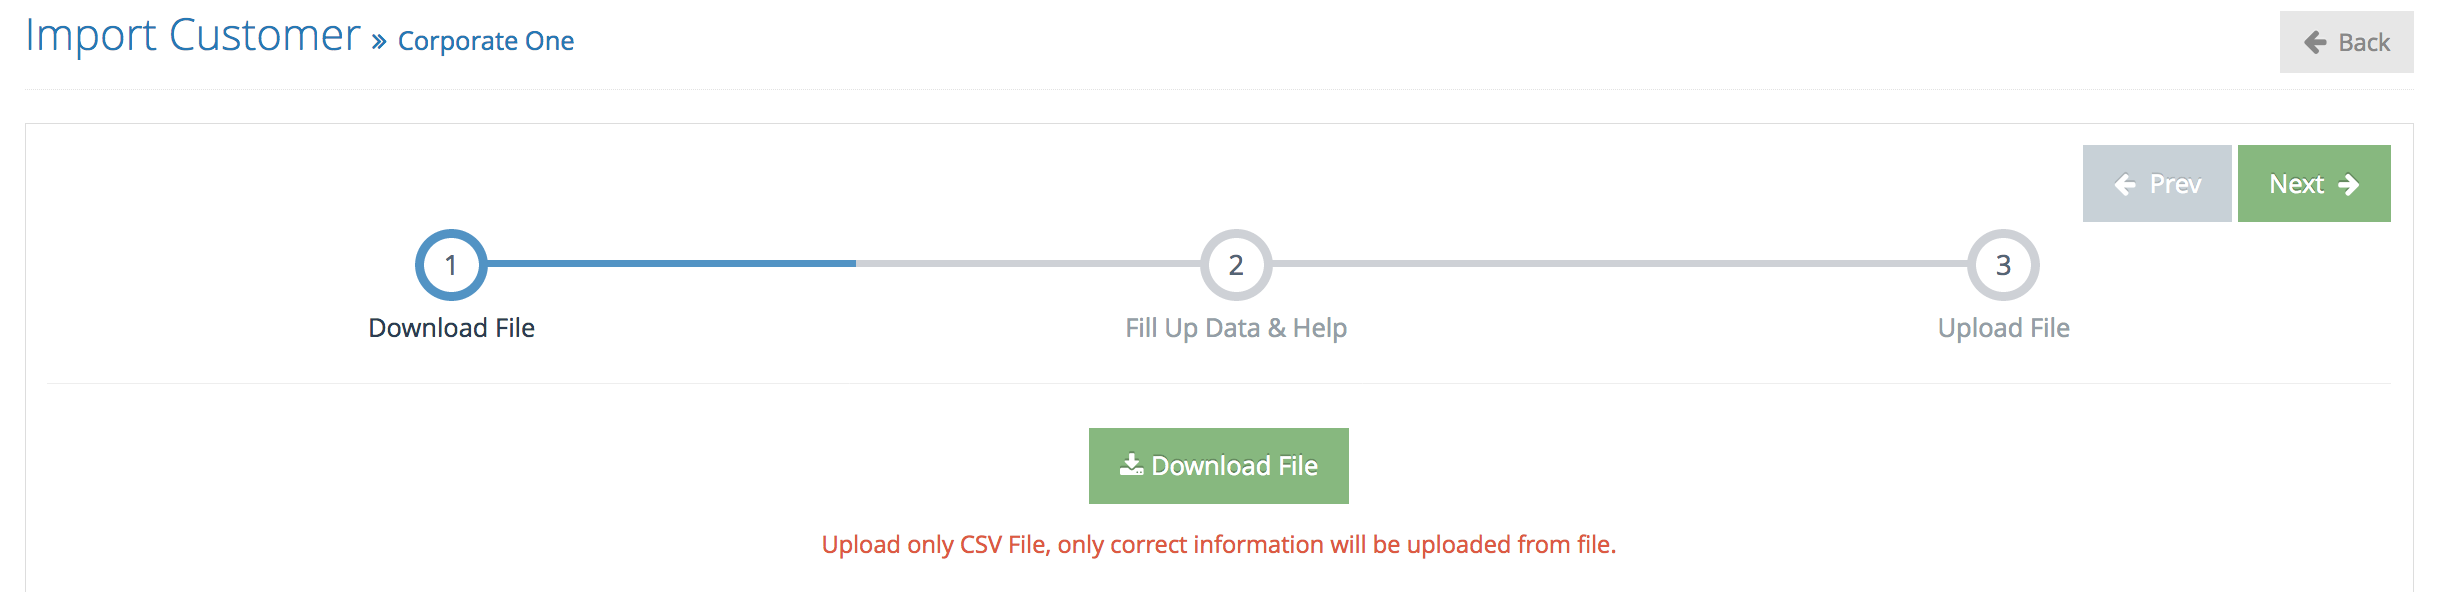
note: click the number ‘2’ to get the help information
b2. Upload your CSV and make sure you don’t have any error

b3. Click Save to import your Corporate Users.
Add a new corporate - special login personalisation
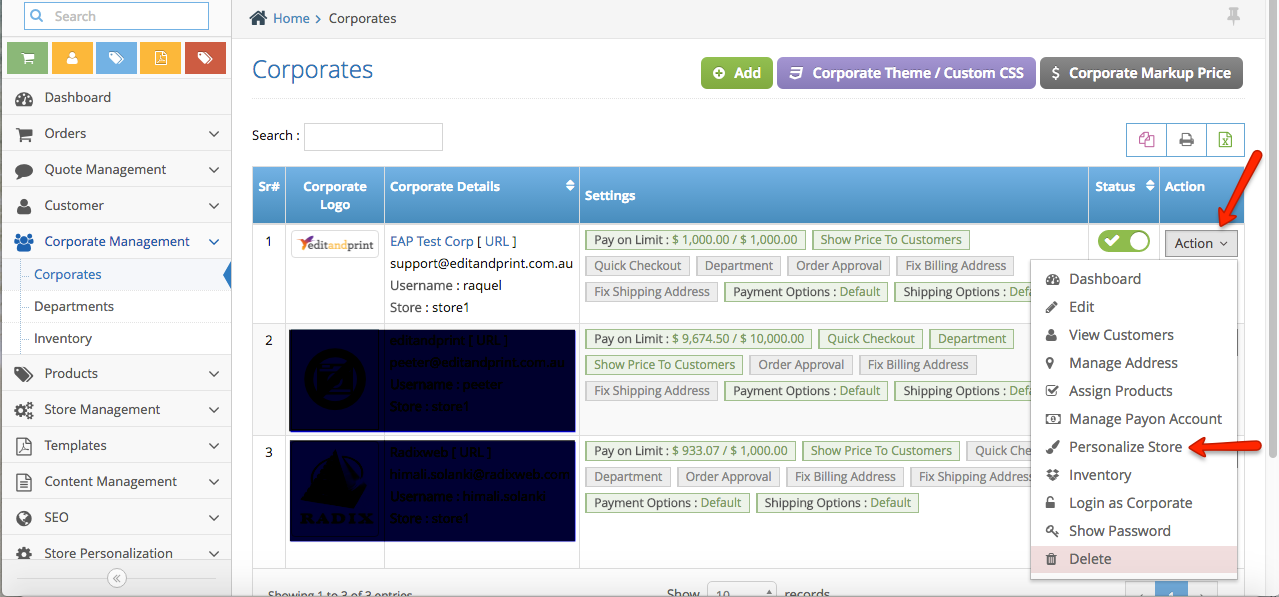
Step 1. From the home page, navigate to Corporate Management section >> Click Corporates. In this page, you should see the corporate accounts on your store.
Step 2. Look for the corporate you wish to edit. Click Action button and select Personalize Store.
Step 3. Enter the content if you wish to display it on Corporate Customer Login page.
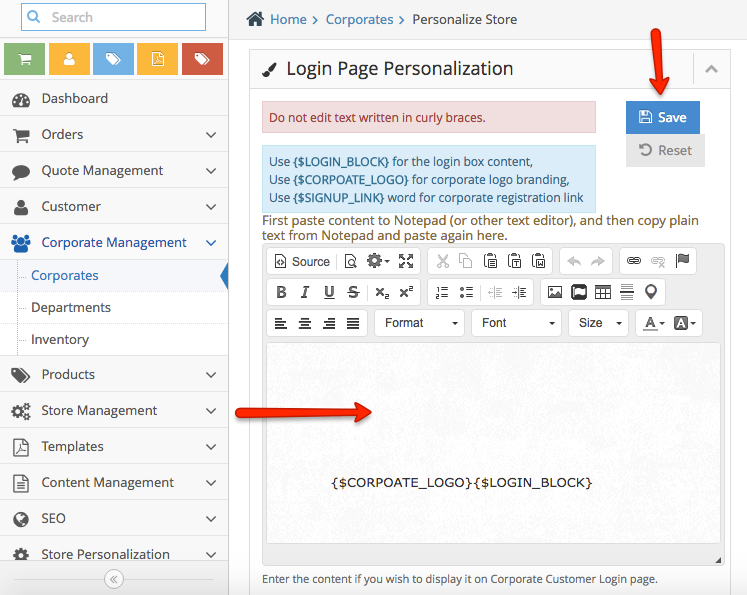
Step 4. Click Save button to apply the changes.
Corporate Special Product & Prices
Step 1. Login to your Admin, navigate to your left-hand side navigation bar Corporate Management > Corporate
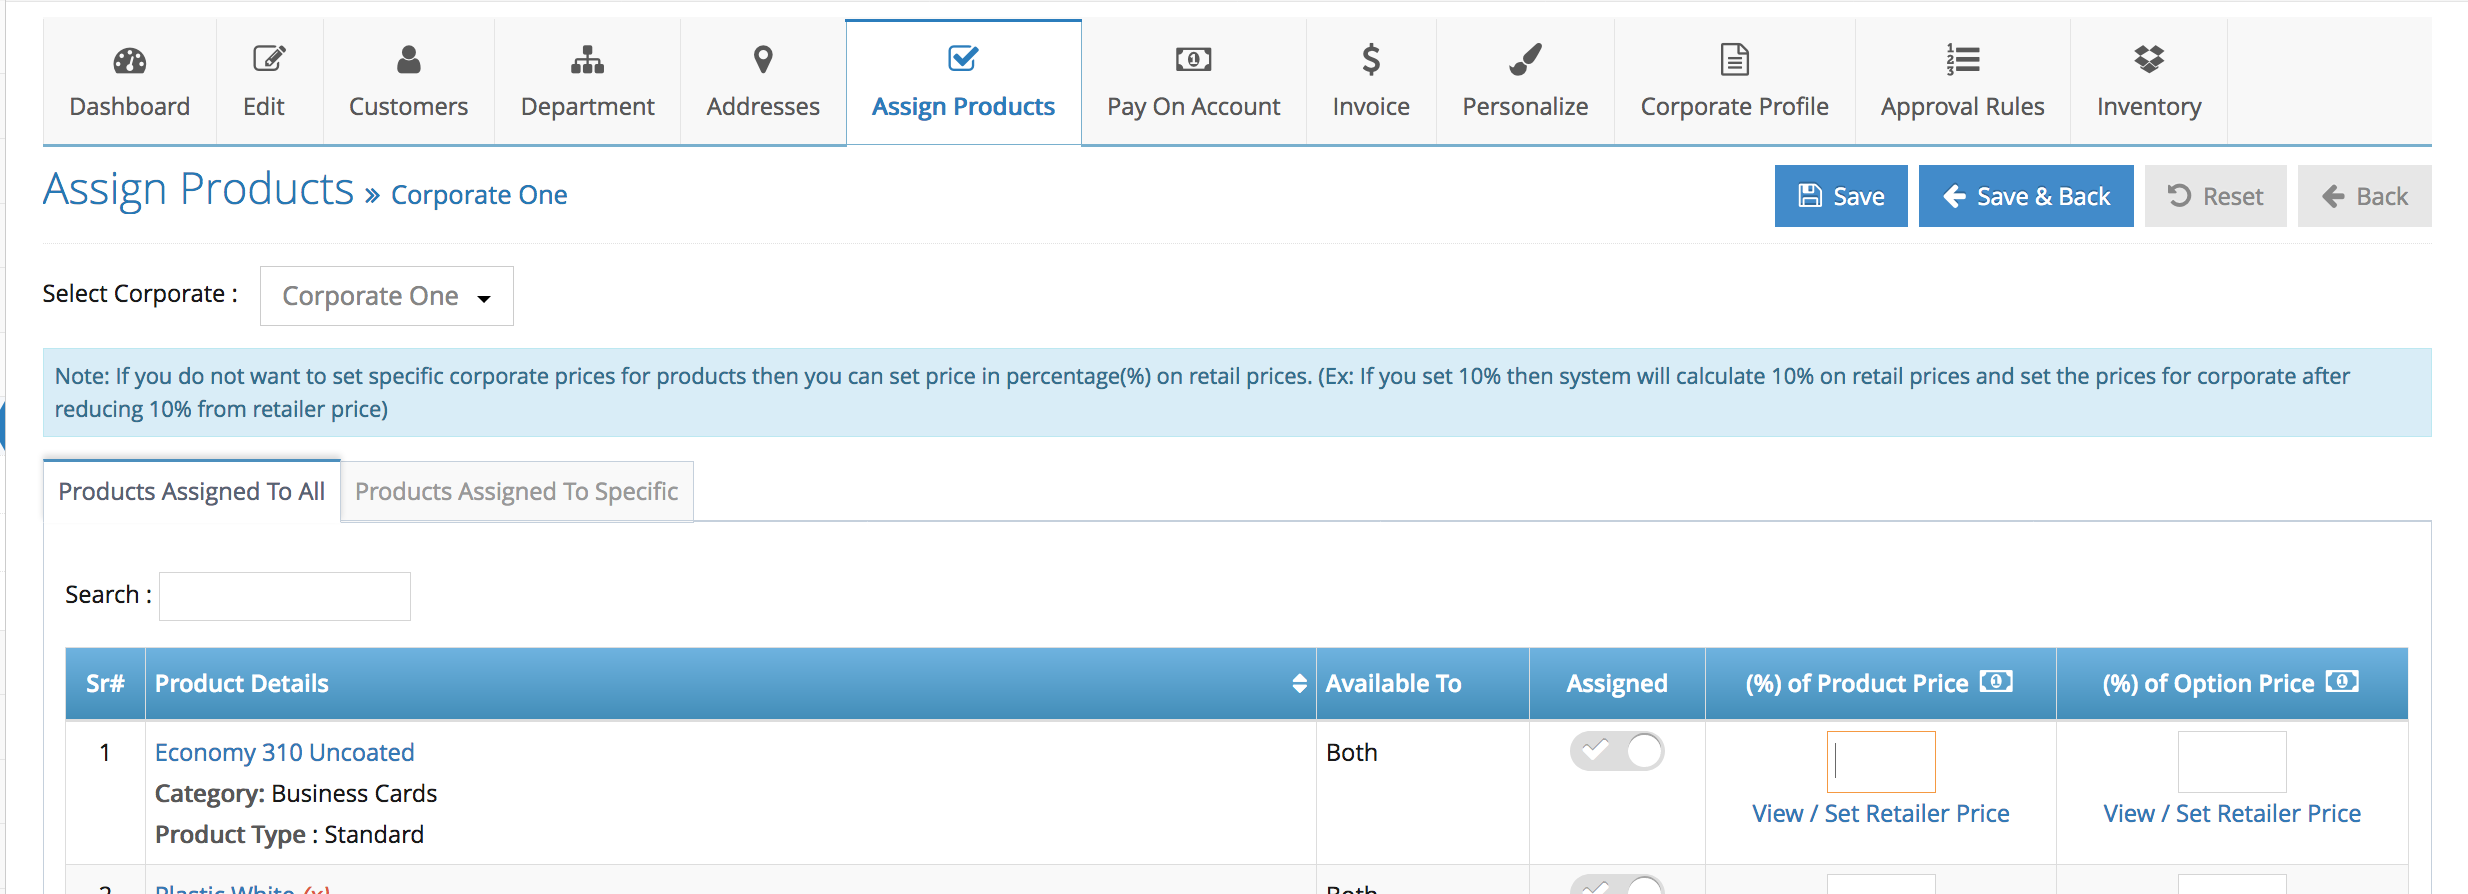
Step 2. Select the Corporate > Click Action > Assign Products
Step 3. On the product assign page, you will see 2 tabs
Products Assigned to All – these are products that have been assigned to both retailers and corporate. Which means that it will automatically be assigned to your new corporate as well.
if you would like to set a special corporate price – simply set the discount percentage on the % price tab column
note: the discount percentage will discounted the profit (retail price – wholesale/vendor price) + the vendor price. Please see the example below:
Wholesale price = $20, Website Mark up =100%, Retail Price = $40 (profit= $40-$20=$20)
Corporate Discount = 50% (50% out of the $20 = $10)
Corporate Discounted Price = $20+$10 =$30
Products Assigned to Specific – these are the product that has only been assigned to retailers. On this page, you can assign the product to the corporate by ticking the box. Once selected, you add the discount percentage.
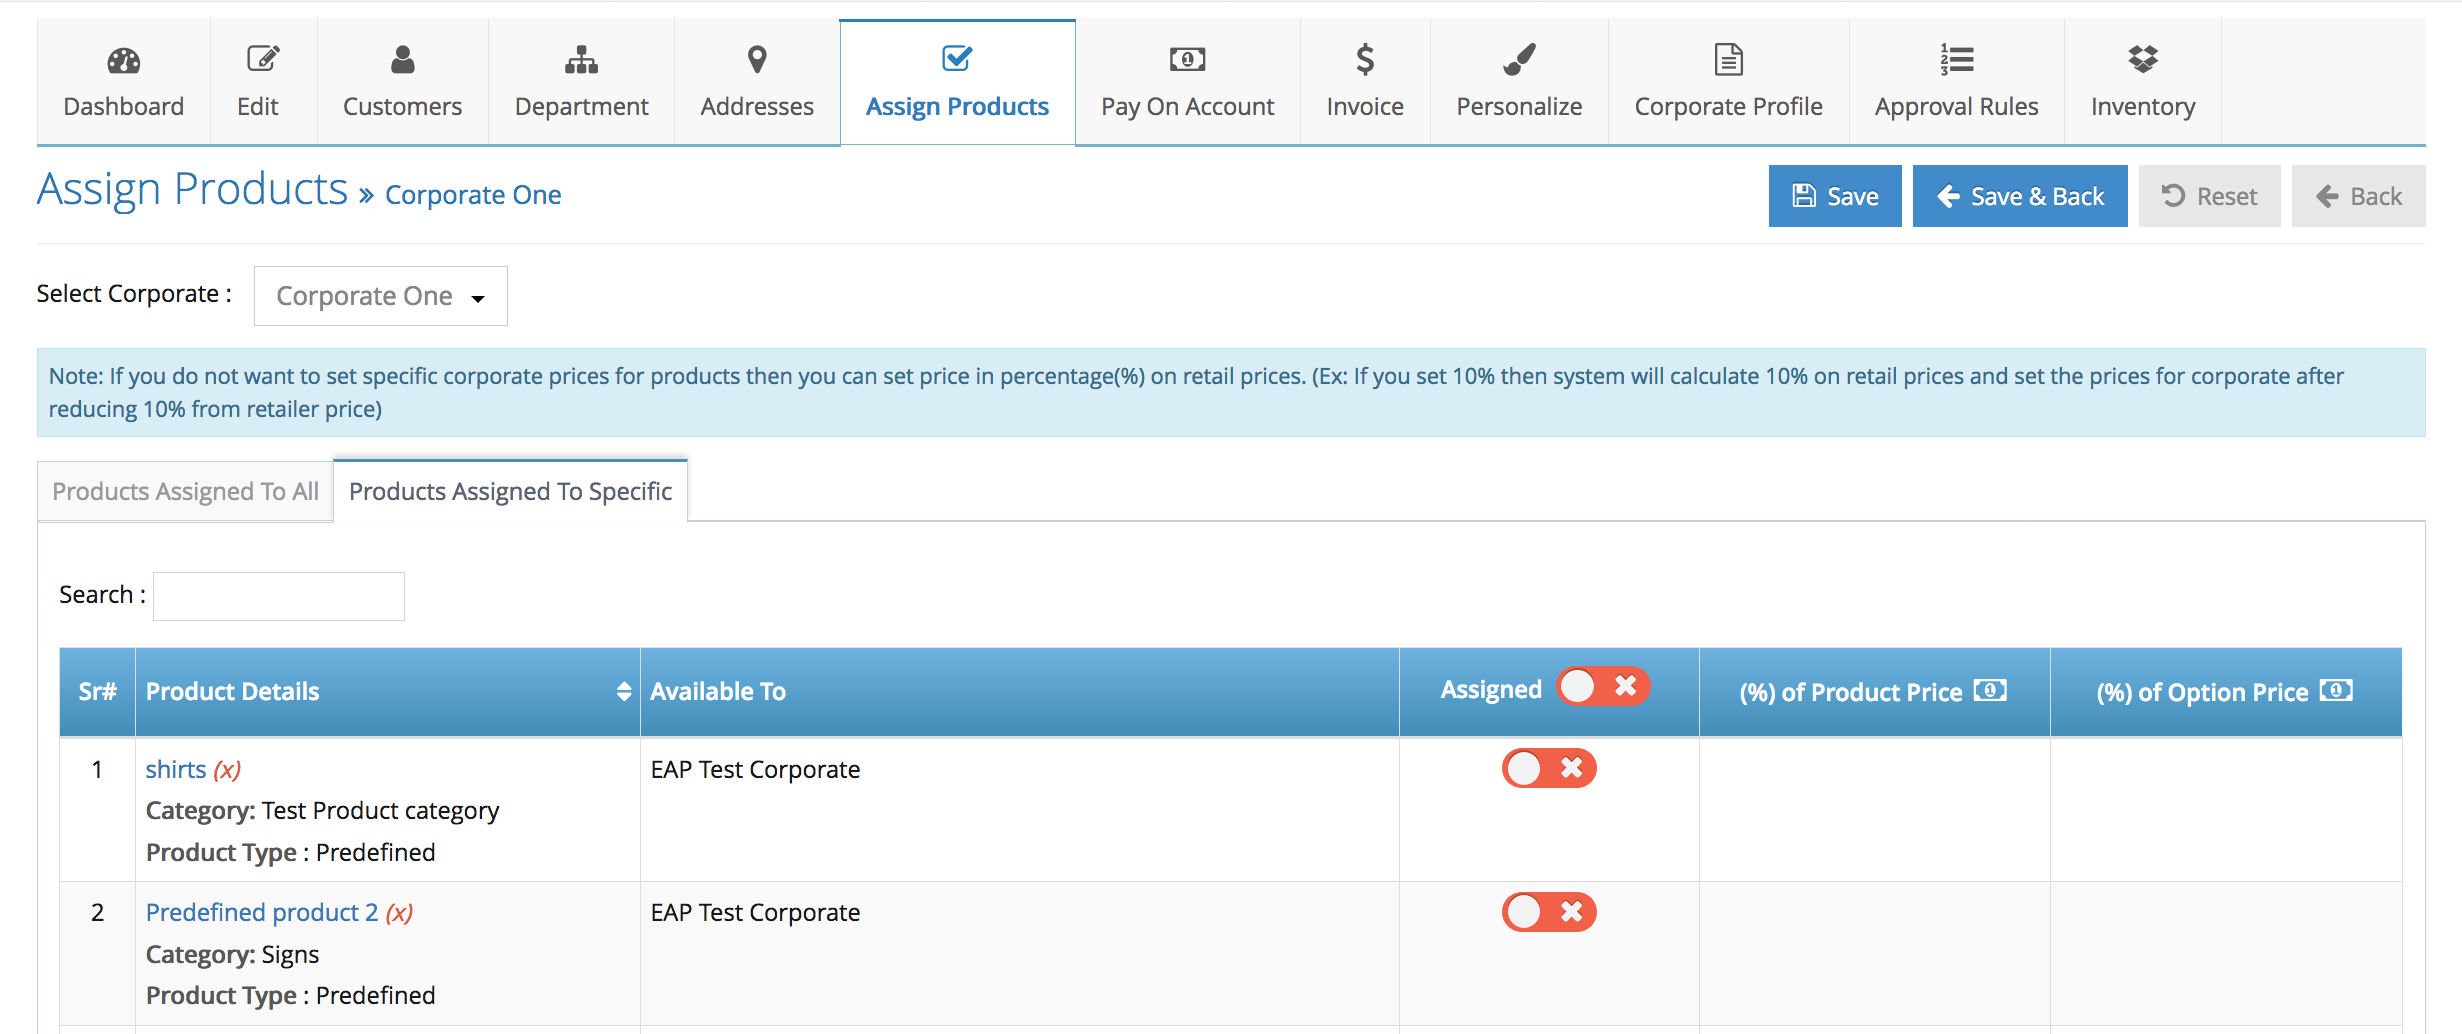
Step 4. Click ‘Save’ to save your changes.
Corporate Special Price
Step 1. Login to your Admin and navigate to the Product > Product Price
Step 2. Search for the products you would like to manage
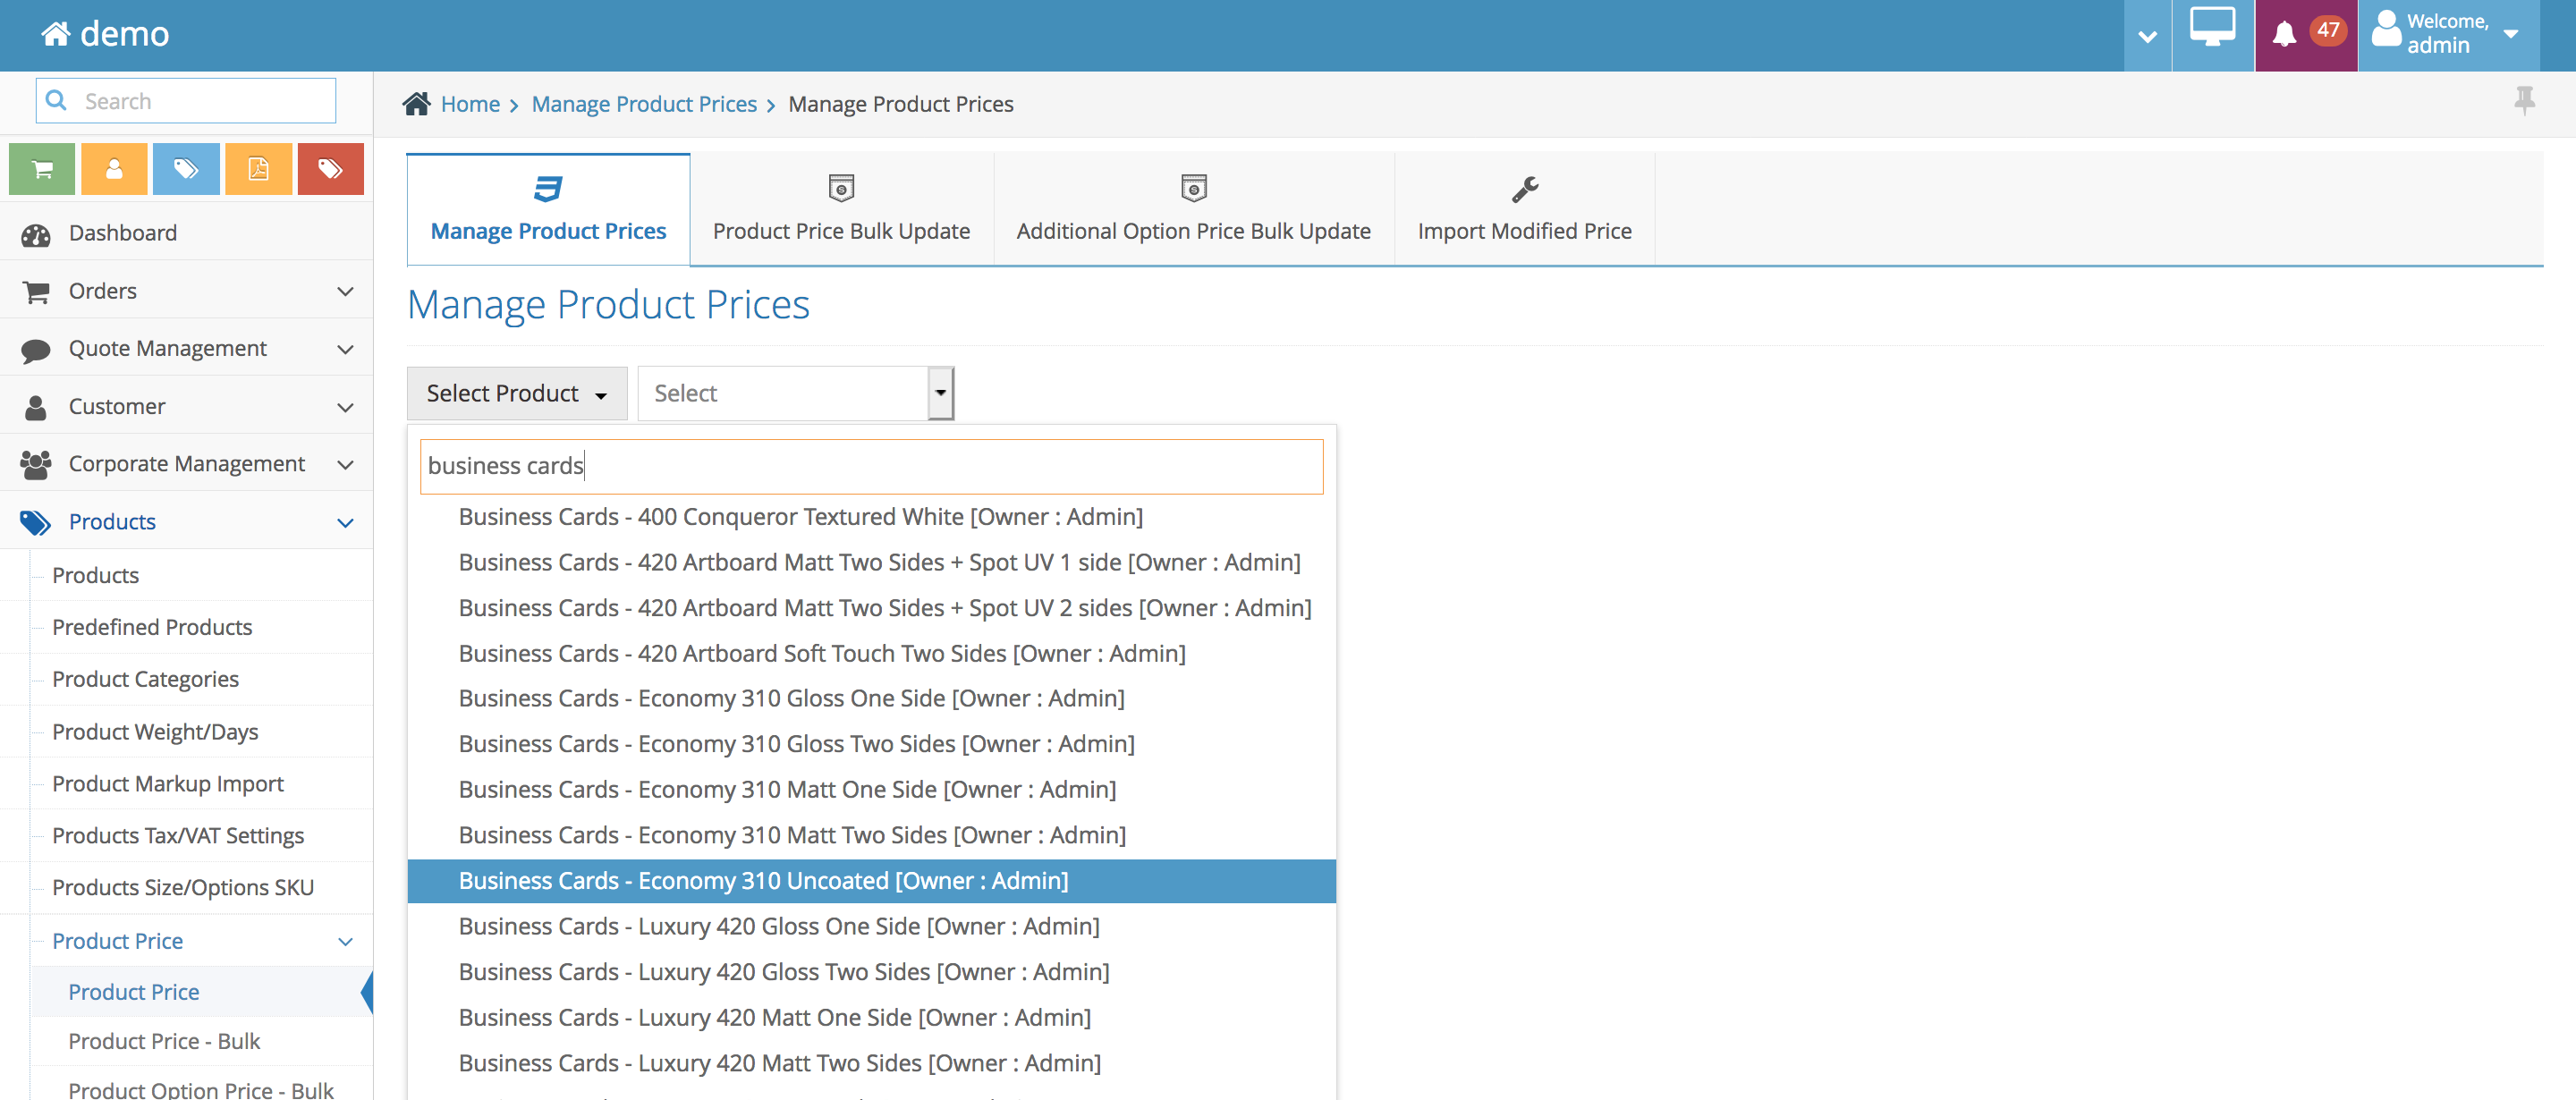
Step 3. Select the Corporate from the second dropdown
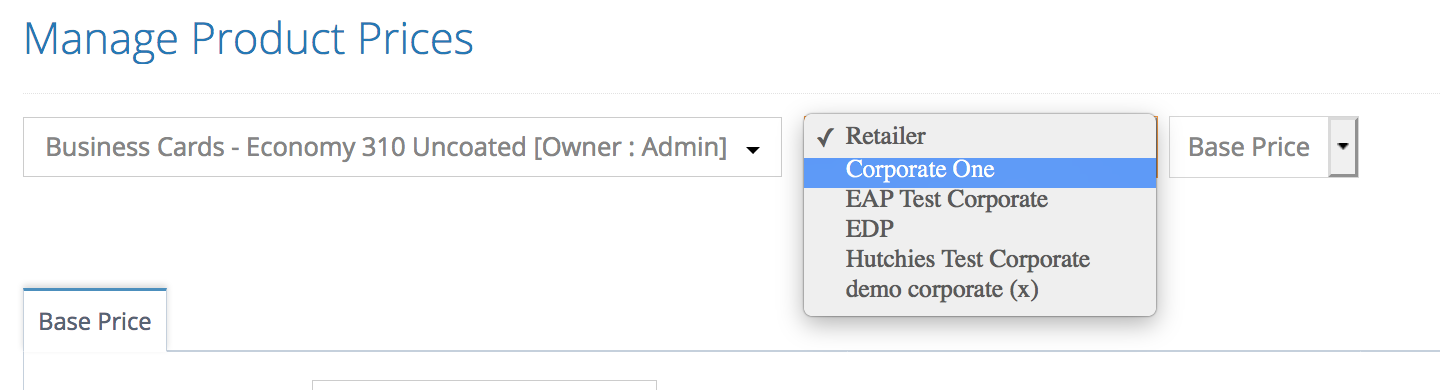
The third dropdown is for the pricing option
Base Price – product base price pricing configuration
Extras – product additional options pricing configuration
Quantity Selection – selecting which qty and size will be available for the corporate user
Step 4a. Updating the base or additional option price – select base/additional option price on the third dropdown
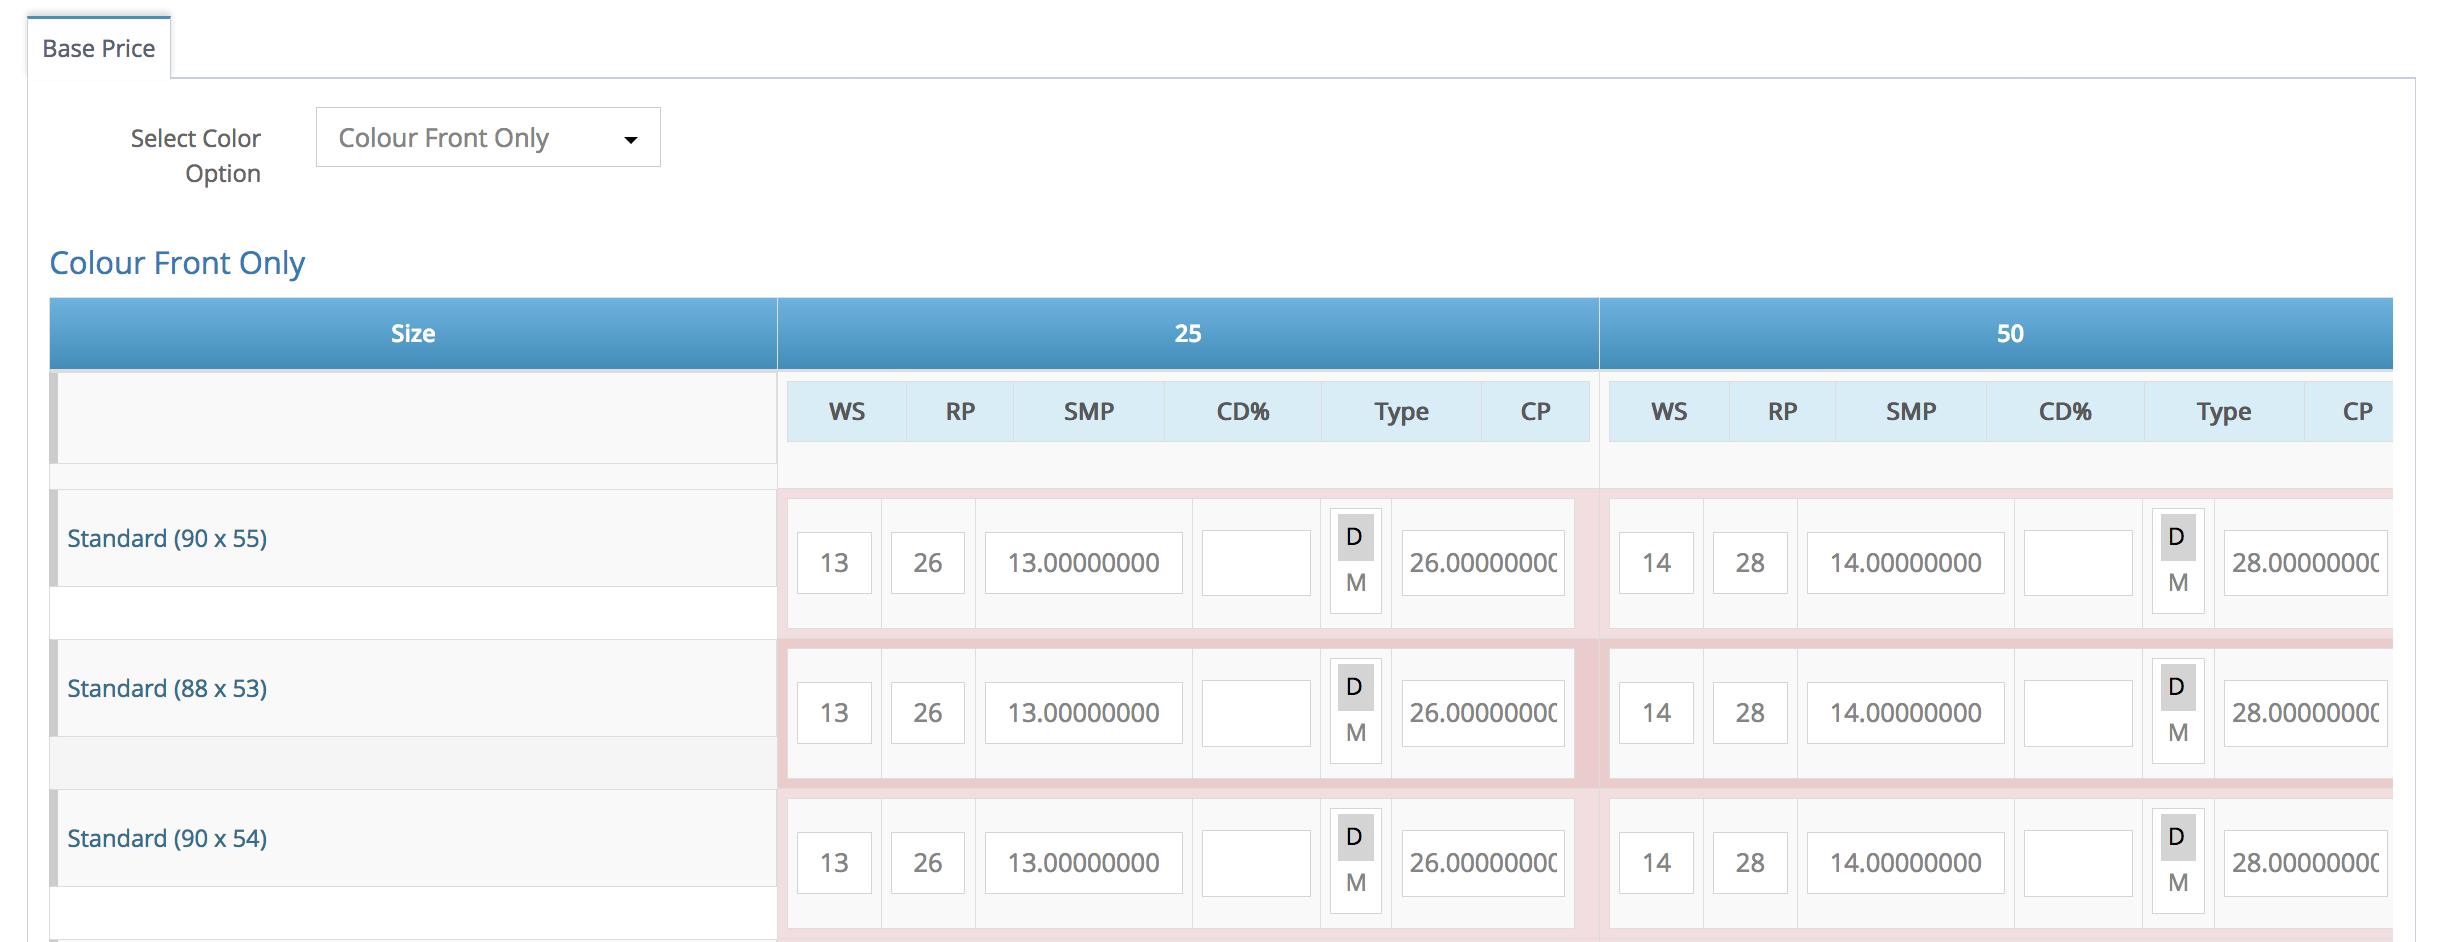
Guide:
WS – Whole Sale Price
RP – Retailer Price – your retail price
SMP – Store Mark up Price – profit / commission
CD% – Corporate Discount
D – Discount
M – Mark up
CP – Corporate Price – price your corporate user will see in the front end +GST
Note: the discount percentage will discounted the profit (retail price – wholesale/vendor price) + the vendor price. Please see the example below:
Wholesale price = $20, Website Mark up =100%, Retail Price = $40 (profit= $40-$20=$20)
Corporate Discount = 50% (50% out of the $20 = $10)
Corporate Discounted Price = $20+$10 =$30
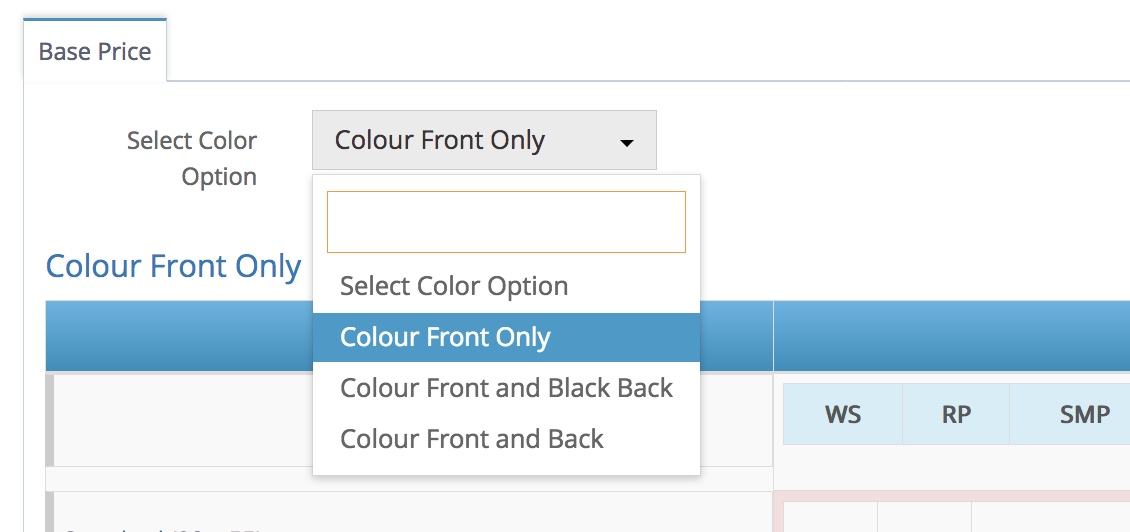
Do not forget to select the colour dropdown for the Admin product to manage all the prices for all colour options
4b. Selecting specific qty or size – select the ‘Quantity Selection’ on the third dropdown

tick just the qty and sizes you would like to offer your corporate user.
Step 5. Click Save to save your changes
Create a department
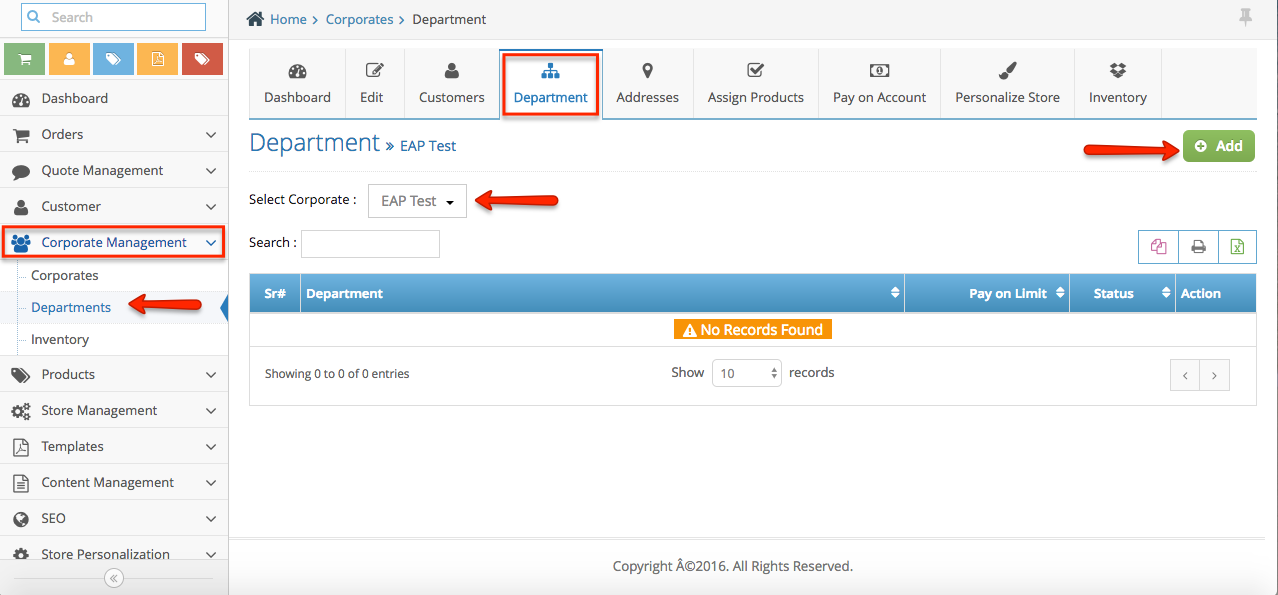
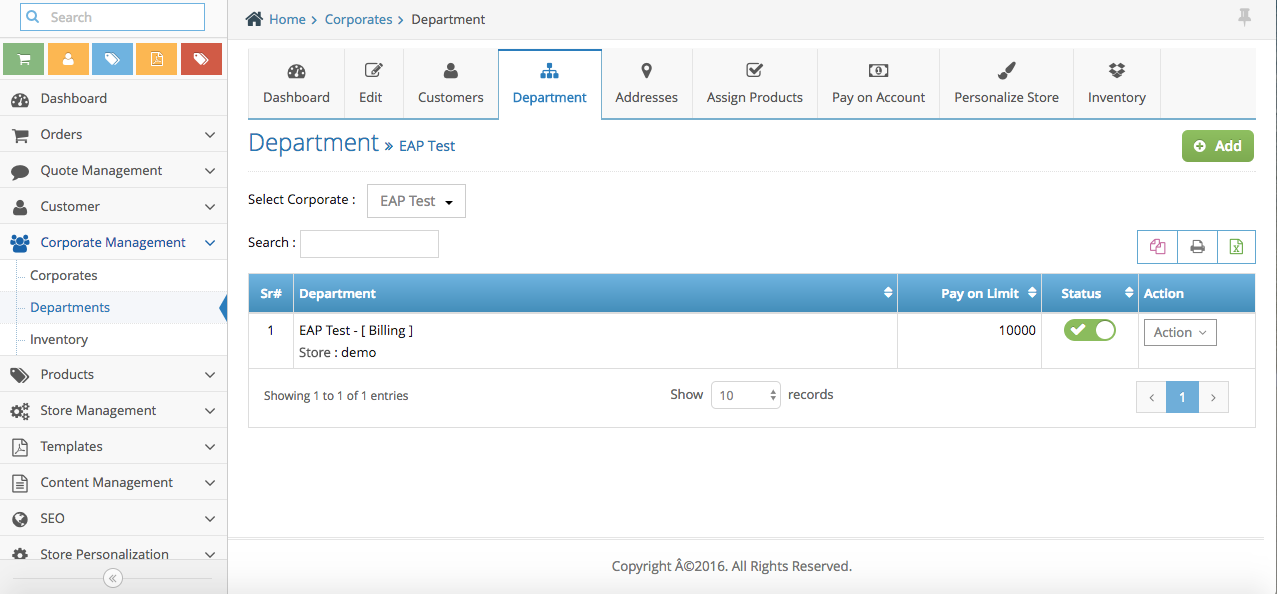
Step 1. From the home page, navigate to Corporate Management section and select Departments.
Step 2. You will be redirected to “Department” tab. In the “Select Corporate”, select the corporate you want to manage.
Step 3. Click Add button to add a department.
Step 4. Fill out this form:
Select Corporate: This is the corporate you wish to manage
Department: Enter your Department name
Pay on Account: Drag the bar to enable
Pay on Limit: This is the maximum amount you can use when purchasing products
Status: Drag the bar to enable
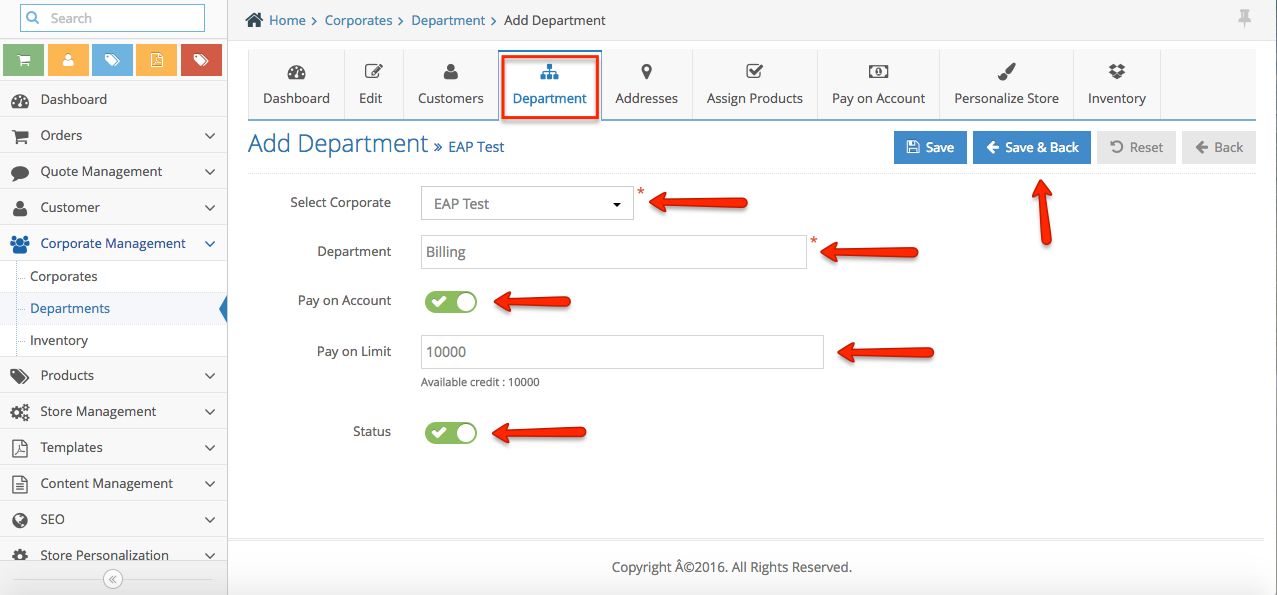
Step 5. Once done, click Save & Back button to apply the changes and to go back to the main Department page.
Adding Access Roles
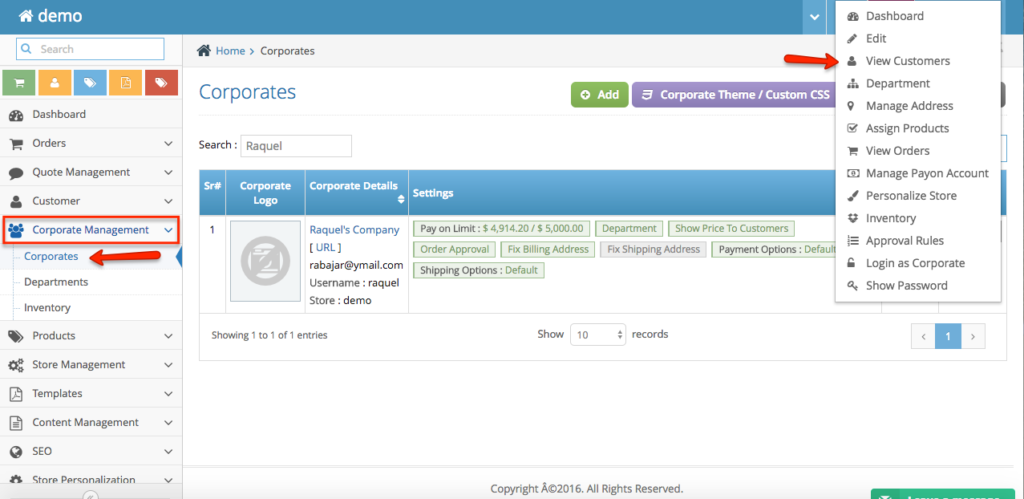
Step 1. From the home page, navigate to Corporate Management section > Corporates
Step 2. Look for the Corporate. Click Action button and Select View Customers.
Step 3. Click Access Roles button.
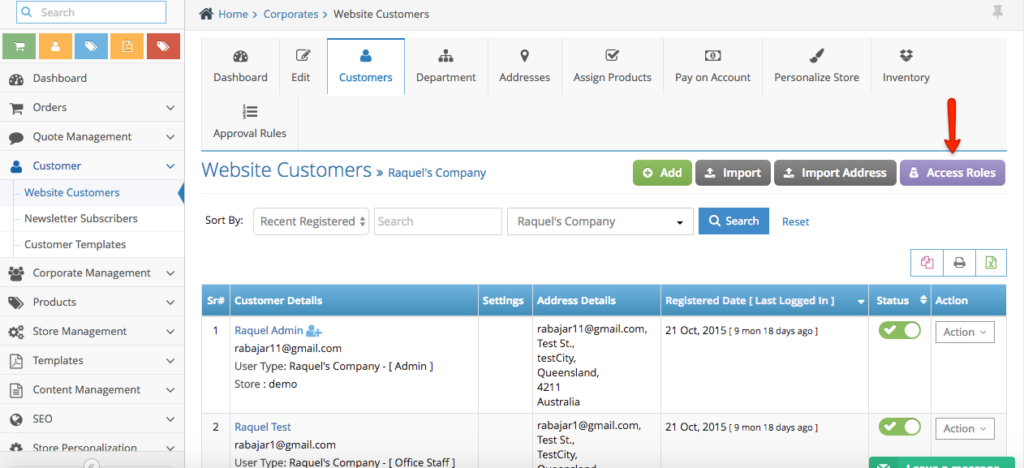
Step 4. Select the Customer, set the access rights and in Order Approval Permission, you can choose between:
Super Approval: An order marked as approved by any corporate customer with Super order approval permission will act as final approval, even though other users might be associated with approving those orders.
Partial Approval: Approval rights are applied partially. There are chances that another person also needs to approve for those orders to get approved completely.
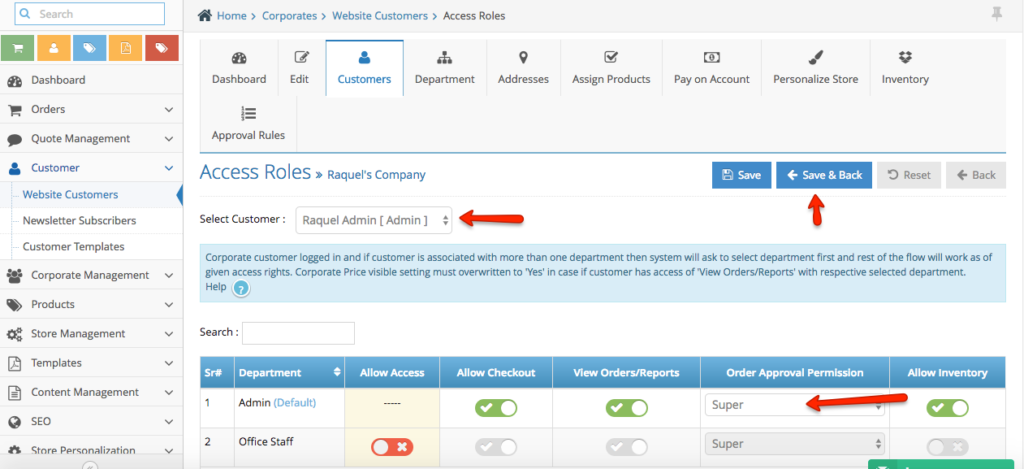
Step 5. Click Save & Back button to apply changes.
Corporate Admin Interface
Step 1. From the home page, navigate to Corporate Management section and select Corporates.
Step 2. Look for the Corporate you wish to manage. Click Action button and select Login as Corporate.
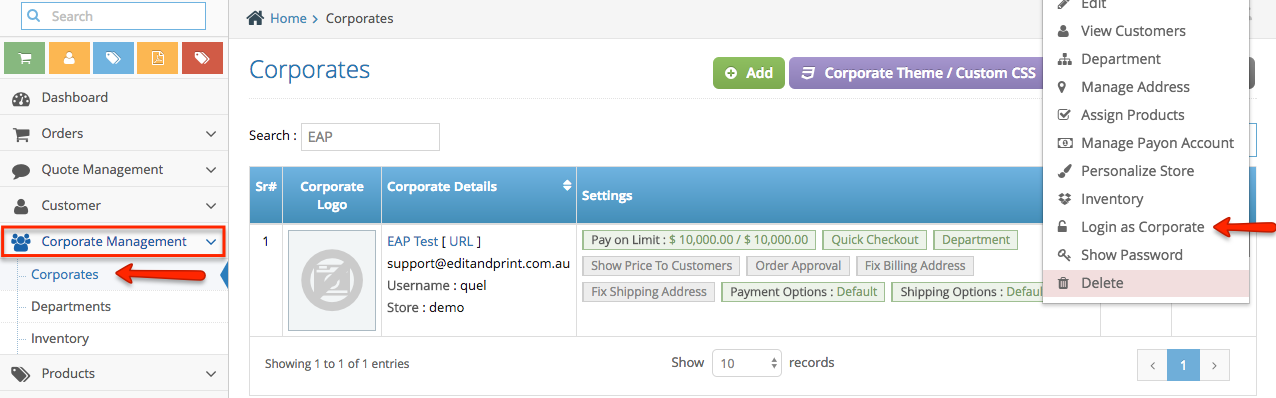
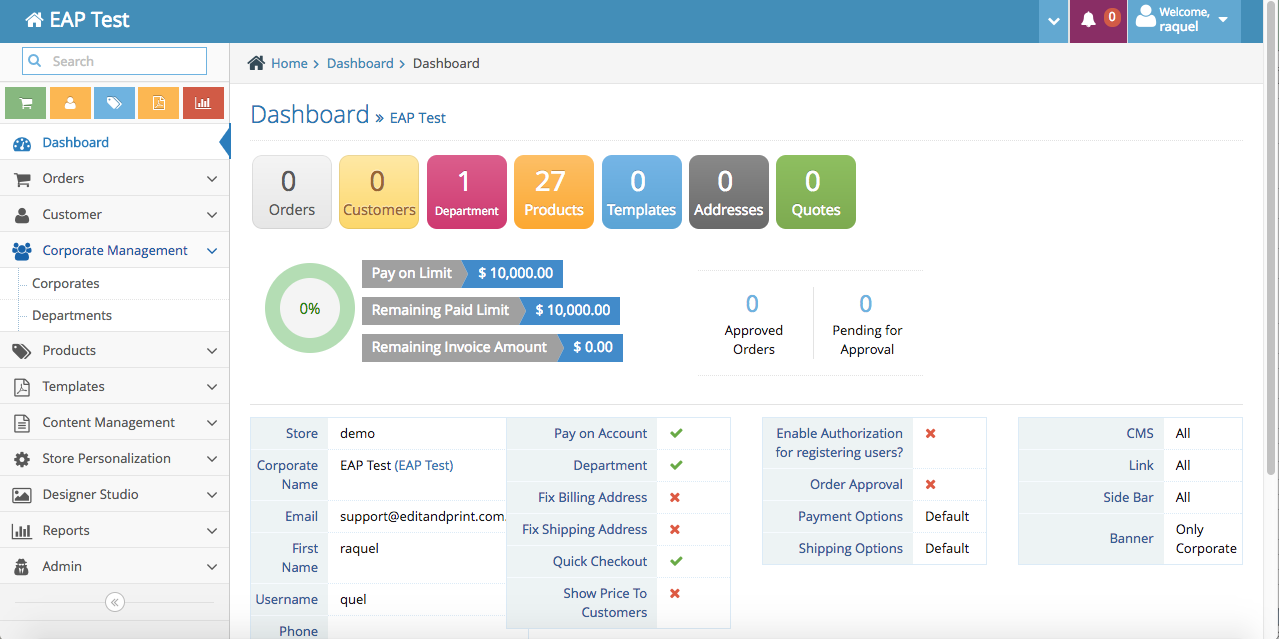
Step 3. A pop-up window will appear. Click OK to confirm and you will be redirected to the Corporate Admin Panel where you can manage several options.
How to manage corporate customer’s printing order inventory
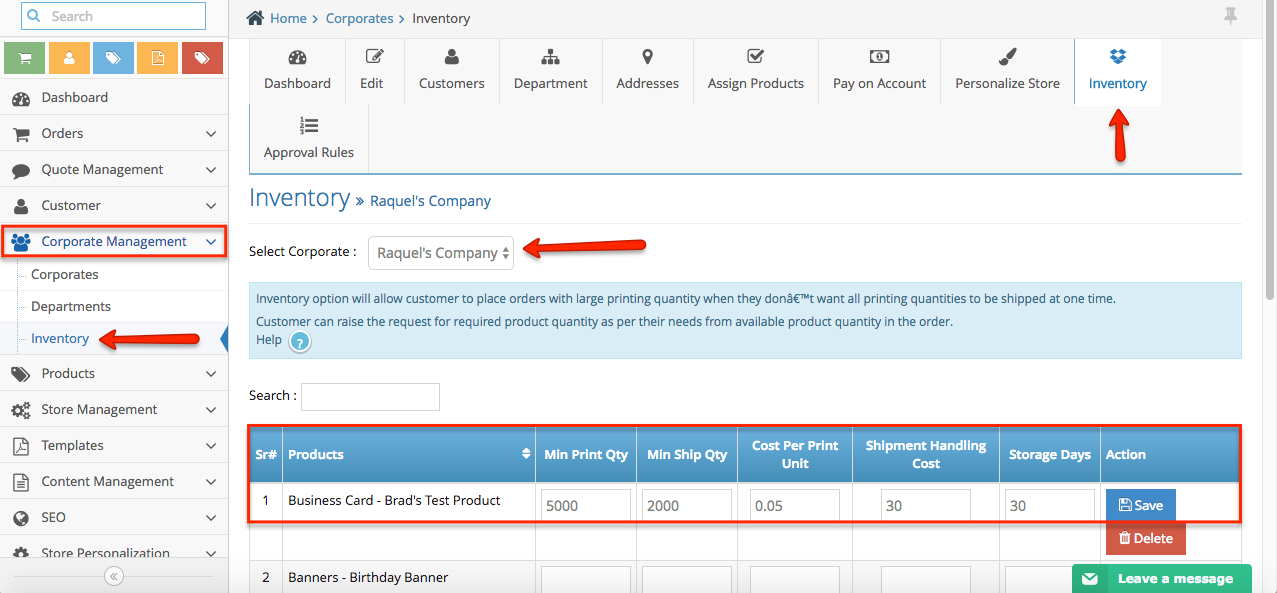
Step 1. From the home page, navigate to Corporate Management section and select Inventory.
Step 2. Select the Corporate and set the inventory option for the product. Once done, click Save button.
Unique contents for your corporate
Step 1. From the home page, navigate to Corporate Management section and select Corporates.
Step 2. Click Action button and select Edit.
Step 3. Scroll down to Content Settings and select your option.
“All” option will be include admin data and settings with corporate data and settings at front side display.
“Only corporate” option will be exclude admin data and settings and display only corporate data and settings at front side display.
Step 4. Click Save & Back button to apply changes.