• Main Menu
    • Feature
    • Showcase
    • Plans
  • Demo
  • Full Suite of Features
  • Inclusions
  • Blog
  • About Us
  • FAQ
  • Contact Us
  • Terms and Conditions
Editandprint
  • Overview
  • Features
  • Showcase
  • Plans

Content Management

  • Content Management page
  • Add New Page & set up link
  • Content Management - Edit Page
  • Content Management - Editing content
  • Content Management - Uploading Image / Media
  • Content Management - Creating Table
  • Content Management - Text Style
  • FAQ category - Add new FAQ Category
  • FAQ - Add a new FAQ
  • Testimonials - Add new testimonials
  • Banner Configuration
  • Banners - Edit existing banner
  • Banner - Add a new banner
  • Website Email Notification
  • Email Template Enhancement

Content Management page

Content Management page

Step 1. From the home page, navigate to Content Management section, then click Contents. This page will show all the website pages available to use for your store. The pages are classified as either Dynamic Pages, or Fixed Contents.

Dynamic pages tab provides default pages and all you need to do is update few information on each pages, the rest will be controlled by a script. You can also leave them as it is

Fixed contents on the other hand, are the pages you have to create from scratch.

Step 2. To add a new page or content, simply click Add button.

Step 3. Fill out the form and click Save & Back button.

Add New Page & set up link

Content Management page

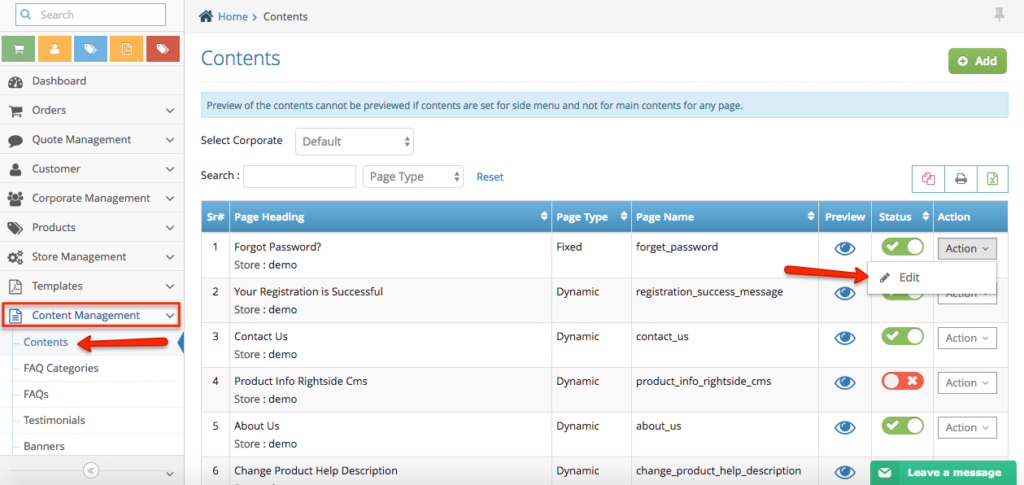
Step 1. Login to your admin side and navigate to the left hand side navigation bar Content Management > Contents

Step 2. In order to create a new page you need to click the ‘+add’ button on the right side

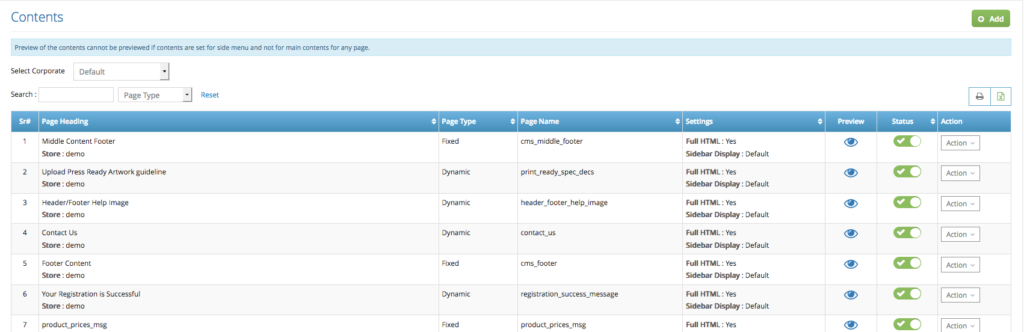
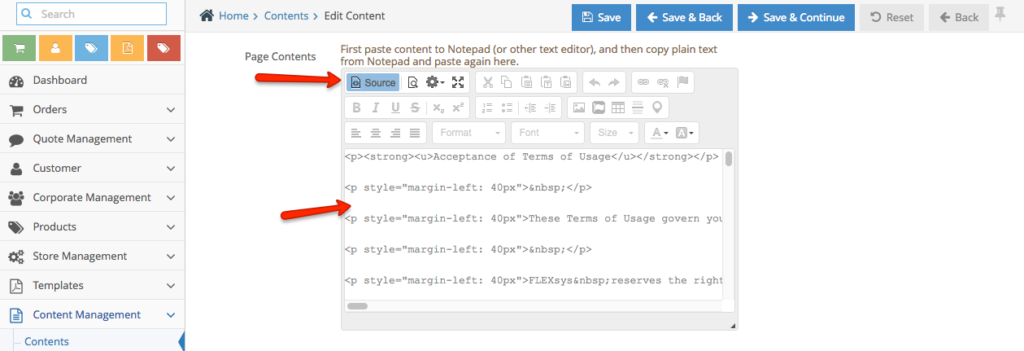
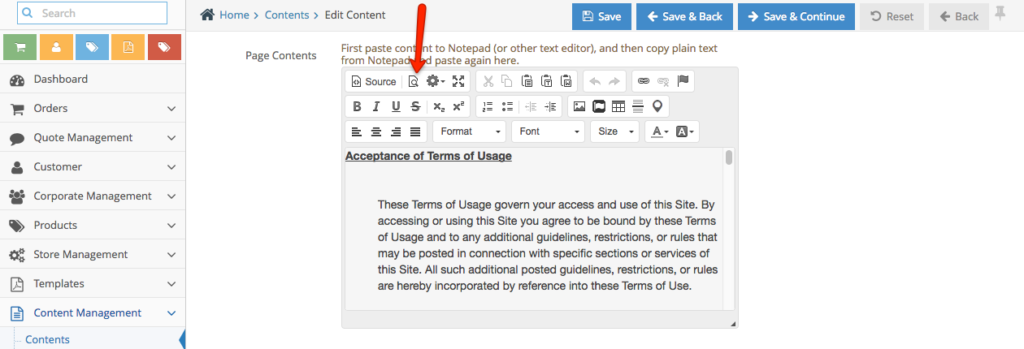
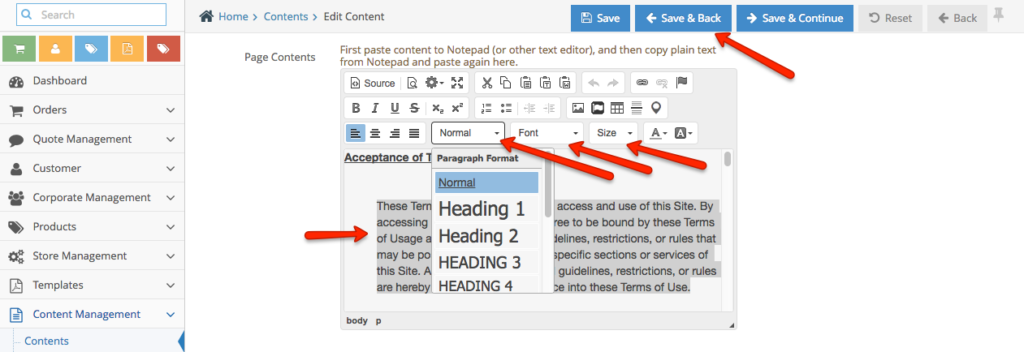
Step 3. Once you’re inside, you can start adding the content for your new page.

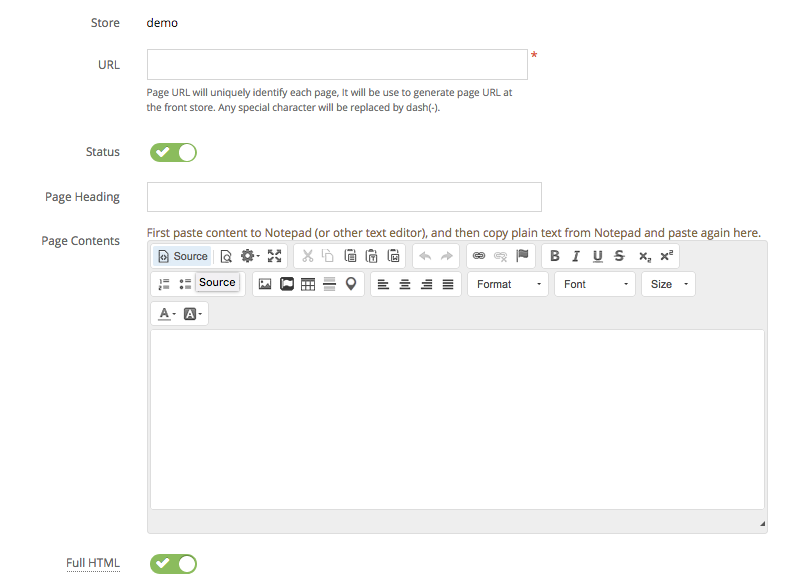
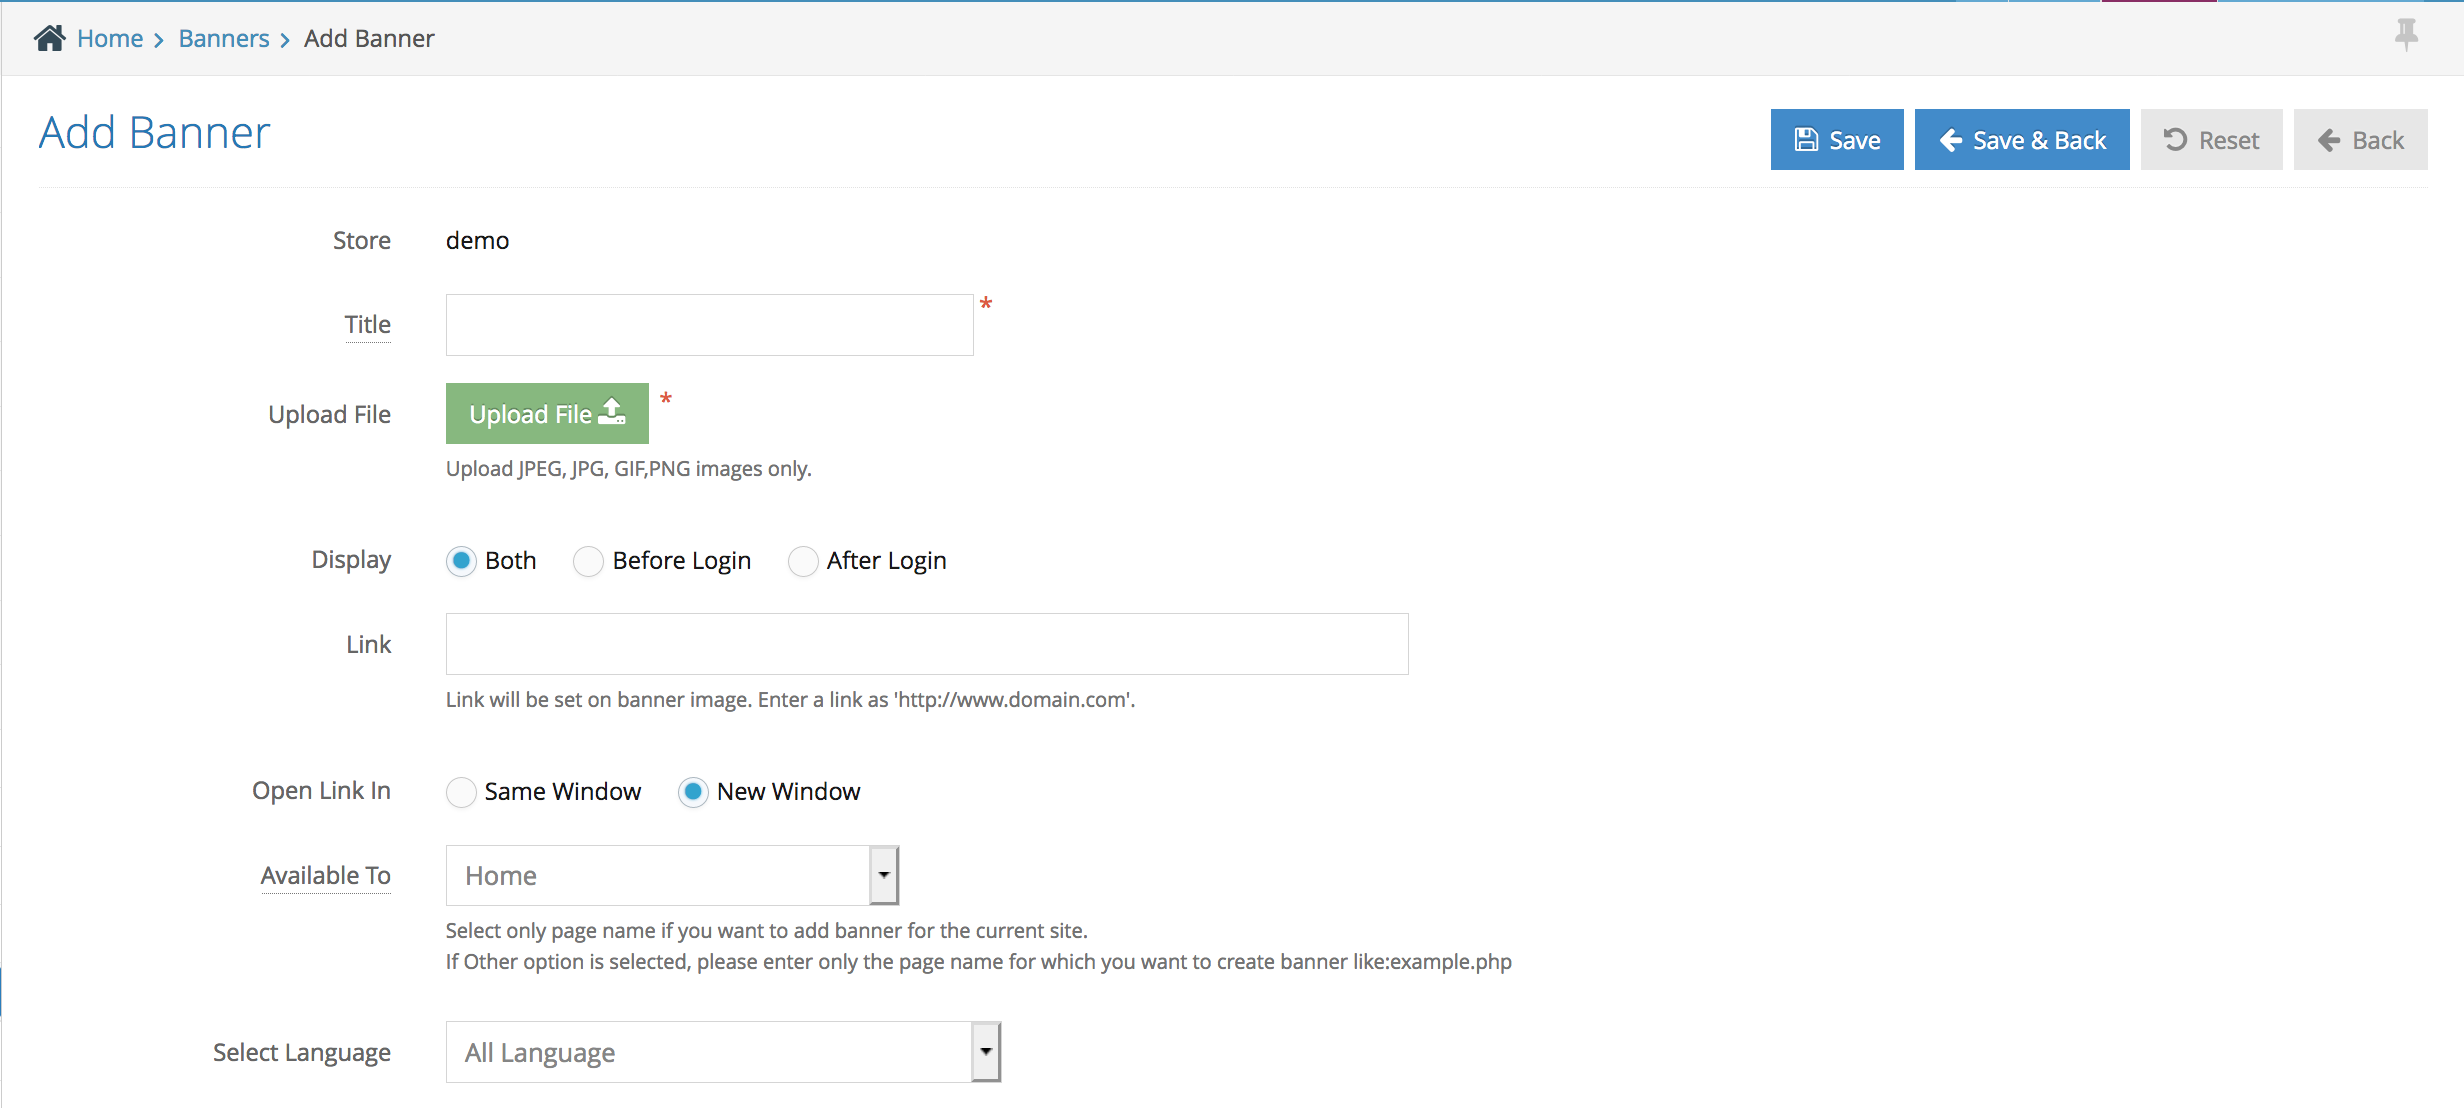
Start by filling out the URL for the page, status of the page, page title, page contents and also the settings for the HTML

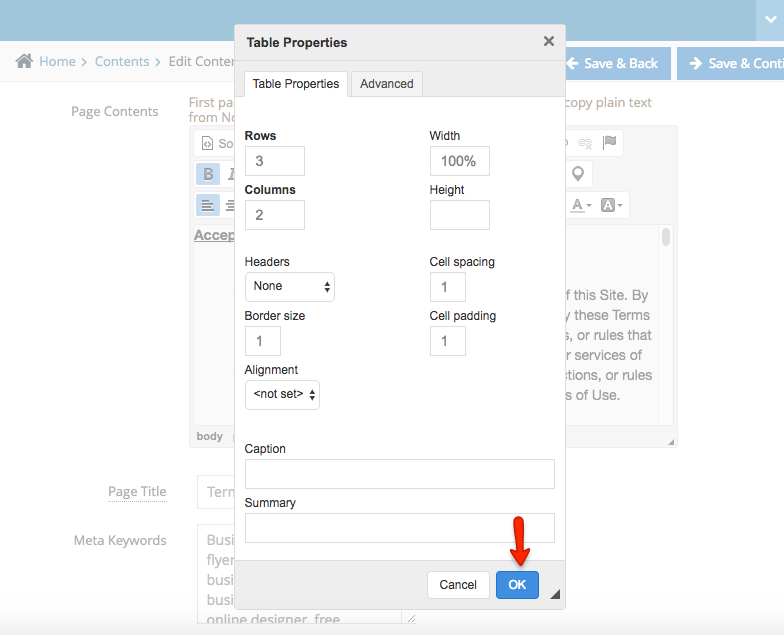
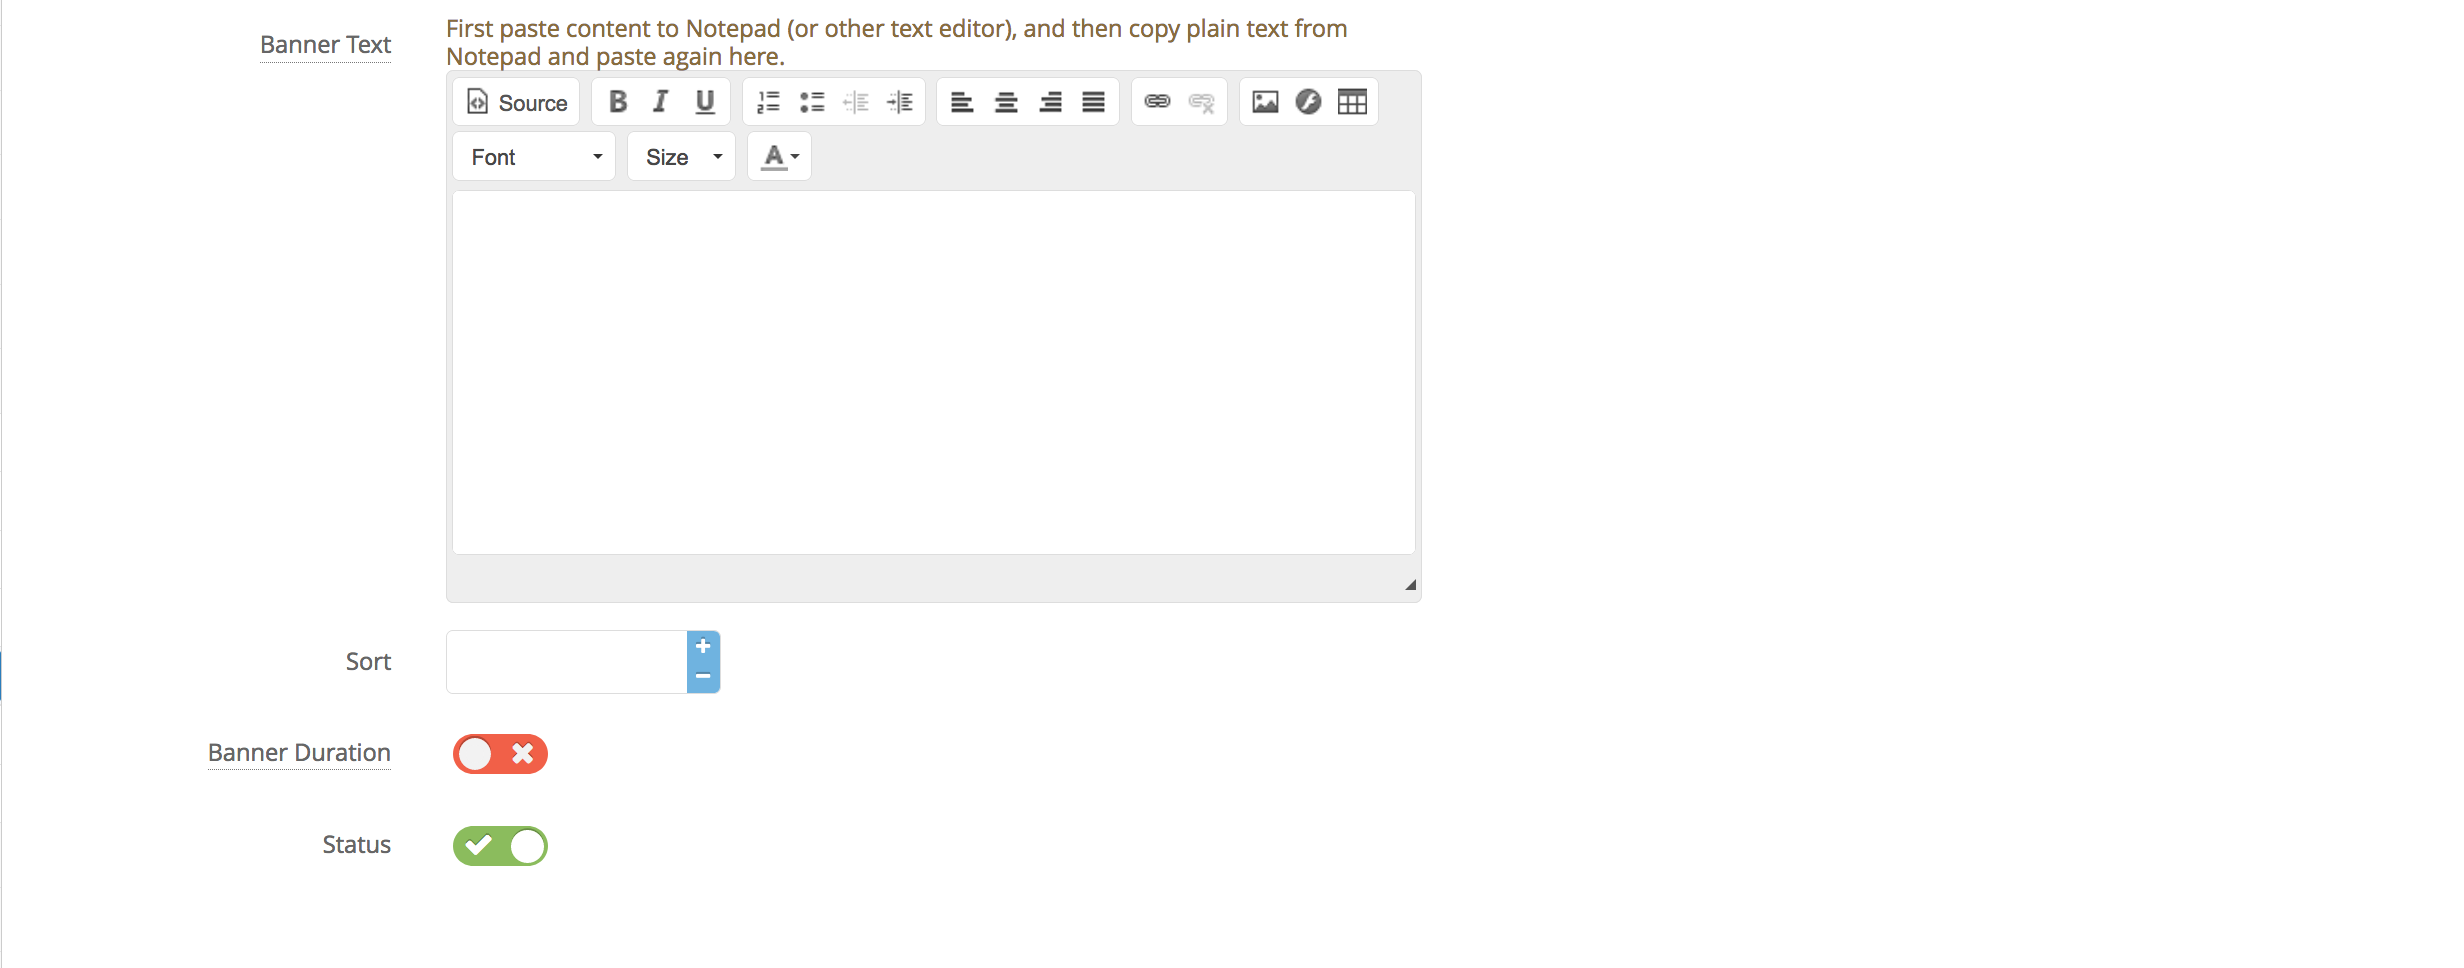
Step 4. set up your page contents settings.


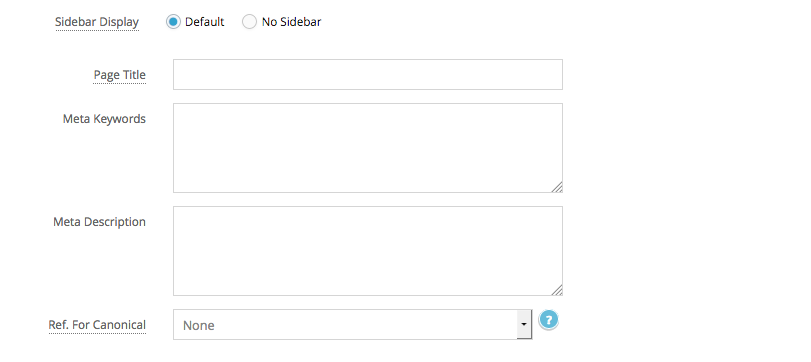
Side bar display whether you’d like to have a sidebar on this page or not, the remaining settings will be related to the SEO such as page title, meta keywords, meta descriptions, and references for canonical.

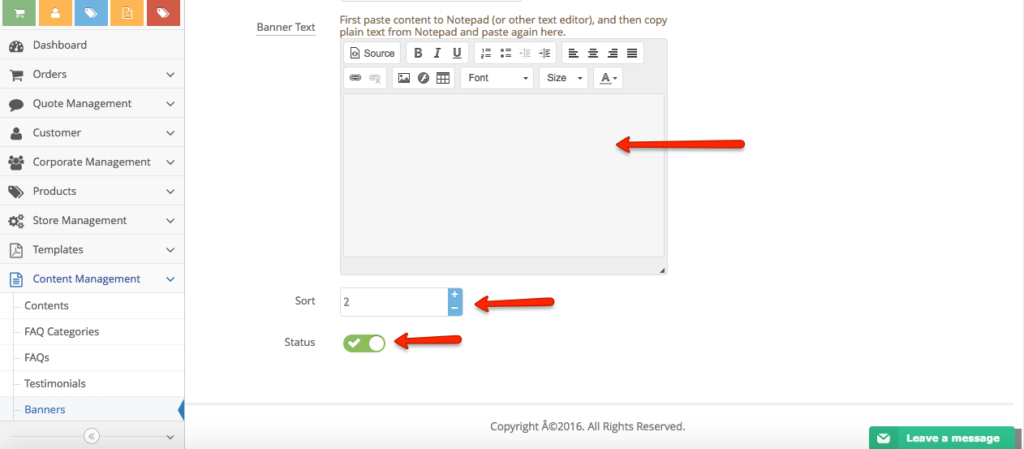
Step 5. Click save & back at the top to save all the changes.

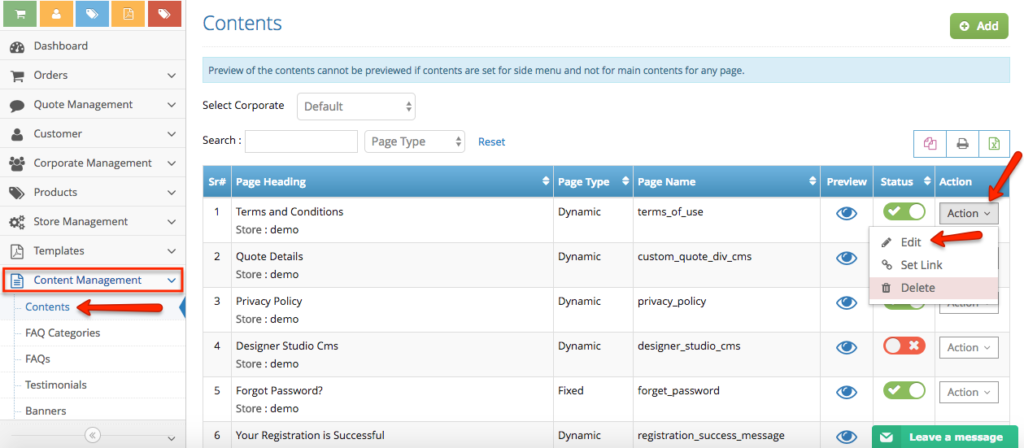
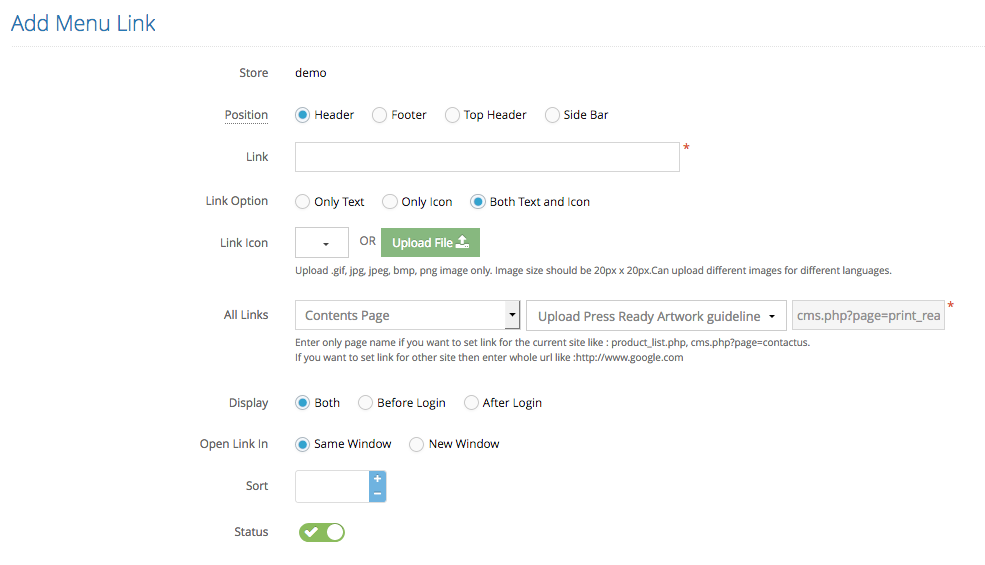
Step 6. After you have created the contents, it’s time for you to set the links for the new page by clicking action and set links.

Step 7. Set up the links for your new page. On this page you can set the position of the links, the link title, options whether the link will be displayed before login, after login only or both, Link icon type, where the link will be linking to (in this case it will be automatically set to the new page you’ve created), open the link in same or new window, and the status of the link.

Step 8. Once you have completed, you can click save to save the set up.

Content Management - Edit Page

Content Management - Edit Page

Step 1. From the home page, navigate to Content Management section, then click Contents.

Step 2. Look for the page that you wish to update the information.

Step 3. Click Action button next to it.

Step 4. In this page, you can update the information such as the Page URL, the page Status, Page Heading, Page Contents, and the SEO Contents.

Step 5. Click Save & Back button once done.

Content Management - Editing content

Content Management - Editing content

Step 1. From the home page, navigate to Content Management section >>  Contents

Step 2. Look for the page you wish to update. Click Action button and select Edit.

Step 3. Scroll down to Page Content section. To select a preconfigured template, click the Templates icon on the page editor. Select the template you wish to use from the list.

Step 4. To view the html code for the page content, click the Source icon on the page editor.

Step 4. To preview the changes you made, click the Admin Preview icon. Once you’re satisfied then go ahead and click Save & Back button to apply the changes.

Content Management - Uploading Image / Media

Content Management - Uploading Image / Media

Step 1. From the home page, navigate to Content Management section >>  Contents

Step 2. Look for the page you wish to update. Click Action button and select Edit.

Step 3. Scroll down to the Page Content section. To upload an image, click Image icon.

Step 4. Click Upload tab, Click Choose file button, select your image and click Send it to the Server button. The URL for your uploaded image will be listed under Image Info tab. On the same tab, you can change the Width and Height of the image, and set the Border and Alignment. Click OK once done.

Step 5. Once done, click Save & Back button to apply the changes.

Content Management - Creating Table

Content Management - Creating Table

Step 1. From the home page, navigate to Content Management section >>  Contents

Step 2. Look for the page you wish to update. Click Action button and select Edit.

Step 3. Scroll down to the Page Content section and click Table icon.

Step 4. Under Table Properties tab, set the number of rows, columns, headers, border size, alignment, and other table properties. You can also click the Advanced tab to see other options. Click OK once done.

Step 5. Once done, click Save & Back button to apply the changes.

Content Management - Text Style

Content Management - Text Style

Step 1. From the home page, navigate to Content Management section >>  Contents

Step 2. Look for the page you wish to update. Click Action button and select Edit.

Step 3. Scroll down to the Page Content section. To format a text, simply highlight your text, then select from the dropdown options under heading, styles, font, size, and text color.

Step 4. Once done, click Save & Back button to apply the changes.

FAQ category - Add new FAQ Category

FAQ category - Add new FAQ Category

Step 1. From the home page, navigate to Content Management section >>  FAQ Categories

Step 2. Click Add button

Step 3. Enter the FAQ Category name, sort and set the status. Once done, click Save & Back button to apply the changes.

FAQ - Add a new FAQ

FAQ - Add a new FAQ

Step 1. From the home page, navigate to Content Management section >>  FAQs

Step 2. Click Add button

Step 3. In this page, you need to select the FAQ Category, Enter the Question and add the answer in the editor. Add sort number and set the status to active/inactive. Once done, click Save & Back button to apply the changes.

Testimonials - Add new testimonials

Testimonials - Add new testimonials

Step 1. From the home page, navigate to Content Management section >>  Testimonials

Step 2. Click Add button

Step 3. In this page, Enter the Client Name who provided the testimonial. In the Description, add the testimonial (message from the customer). Set the sort and status to active/inactive. Once done, click Save & Back button to apply the changes.

Banner Configuration

Banner Configuration

Step 1. From the home page, navigate to Store Management section >>  Banner Settings.

Step 2. In this page, you can update the Banner Width, Height, enable the Slideshow, Slide Transition timeout, and other banner properties.

Step 3. Once done, click Save button to apply the changes.

Banners - Edit existing banner

Banners - Edit existing banner

Step 1. From the home page, navigate to Content Management section >>  Banners

Step 2. Look for the Banner you wish to update. Click Action button and select Edit.

Step 3. In this page, you can make modifications.

Step 4. Once done, click Save & Back button to apply the changes.

Banner - Add a new banner

Banner - Add a new banner

Step 1. Login to your Admin side and navigate to the left-hand side navigation bar Content Management > Banners

Step 2. Click ‘Add’ button on the top right of the page (green button)

Step 3. Follow the step by step process of adding a new banner

Title: banner title for internal purposes to tell which banner to which (e.g. Christmas 2019)
Upload File: upload your banner image (accepting .jpg, .gif, .png)
Display: settings to set whether the banner will display only before customers login, after or both.
Link: linking the banner to a specific URL
Open Link in: settings to set whether the link opens in the same window or new window
Available To: set the banner to be displayed on a specific page on the website (homepage, a specific product, etc..)
Language: coming soon

Banner Text: adding a text in on top of your banner image.
Sort: set the order of the website banner (when there are multiple banners assigned on the same page)
Banner Duration: set the display duration of the banner (the system will automatically inactivate the banner when it reached the expiry date)
Status: website banner status feature for you turn off the banner temporarily.

Step 4. Click Save to Save your Banner

Website Email Notification

Setting up Email Notification Settings

Setting up the email notification is one of the most important parts of the website set up. The settings will be based on where the automated email will be sent from, copy/cc to, and reply to. Below will be the step by step process how you can configure your website email notification.

Step 1. Login to your admin side > navigate to the Content Management > Email / SMS notification from the left-hand side navigation bar.

Step 2. Click the ‘Set Email Notification’ button (green colour) at the top of the page

Step 3. Inside the page, you will be able to see the list of the email subject for all scenarios we have covered on the website (e.g. thank you for signing up, forgot password, order confirmation, etc..)

Step 4. On each email subject you will also see the ‘From’, Reply To’, ‘To’ & ‘CC’ box where you can set different email on each section.

From: to set where the email will be sent from
Reply-To: to set where the email be sent to when customers are replying
To: to set where the email sent the customers will be copied to
CC: to set to which email the copied email will be cc’ed to

You can also see the notification button – settings to turn on/off the specific email subject.

Note: at the very top you can also see the ‘Common’ title – this can be the master settings where when a specific email subject does not have any email set up, it will inherit the common settings.

Step 5. Click Save to save your changes

Email Template Enhancement

Email Template Enhancement

This enhancement is intended to help you in creating an Email template for any event that happened in the site by providing the Dynamic Variables table on the right side of the page.
All you have to do to insert it in the email template is just by clicking the + button beside the Variable you want to use.

To go here just follow these steps,

  1. Content Management > Email/SMS Notifications
  2. search the email template you want to edit
  3. Action > Edit
  4. The Dynamic Variables are on the right side of the page
  5. If you want to insert it into the template, just click the + on the specific variable you want to use.
  6. When you’re done click Save

Other Training Module :

Order Management
Quote Management
Customers
Corporates
Products
Store Management
Templates
Content Management
SEO
Store Personalisation
Business Partners
Store Configuration
Designer Studio
Reports
Support

If you can't find what you want please let us know

[contact-form-7 404 "Not Found"]

Contact Us

We're currently offline. Send us an email and we'll get back to you, asap.

Send Message

Main Links

  • Demo
  • Feature Index
  • Our Plans
  • About Us
  • Terms and Conditions

Contact Info

  • 0414 586 892
  • peeter@editandprint.com.au

Fresh from blog

  • Online Editor Help Message Update
  • Content Structure
  • EditandPrint V.7 – Phase 2
  • Gearing up for Online Promotion
  • Personalised Job Board

Find Out More