Summary : Promotional Product module allows you to be able to creates a fix product where your customers are able to add to their cart without having to upload artwork or design anything.
Promotional Product Module
Introduction to promotional product module
You can find a new sub navigation for promotional products under the Products on your admin left hand side navigation bar.
On the promotional Product page, you will see a similar set up with the normal products where you can see the filter at the top to find a specific product.

Search box
product category dropdown
User type ( retailer or corporate )
Store filter ( E&P or affiliate products )
price calculation method ( fixed qty and price, range based with or without multiplication )
Top Bar
Add : add a new promotional product
Kit Product : add a new kit product
Related Product : manage promotional product related product
Import Product : import multiple product on to the system by using excel sheet import.

Promotional Product Table:
SR# – serial number for promotional product
Images – promotional product thumbnail
Product Details Column : overview of product (product name – product category, sizes available, icons
Note: in the product details column you can see icon such as ‘Size’, ‘ Product Options’ , ‘A’ and also different colour (green and gray) – please find the explanation below
Size : meaning that the product has the Size option activated
Product Options : Additional Options / Extras of the products
A : Affiliate Products
Colour Guide:
Green : options are available in the products
Gray : No options are available in the products
Settings Column:
Quick overview of your products settings.
Available to : whether it’s available to retailer / specific corporate/ both.
Store: name of your shop
Price Category : type of calculation method of the product
Allow Free Shipping : whether the options for free shipping are available
Sheet Calculation : whether the product calculates using sheet calculation based.
Sort Column :
Sort order of the products
Note : you can edit the sort order of the products by clicking the pencil icon on the sort column, change the sort number on each products and click save on the sort column again to save the changes.
Display on Home :
Setting to check and edit whether you’d like to have the product to be display on the homepage (this also related to the middle section of homepage setting)
Status :
Status of the product
Red : product inactive and it won’t be display in the front end side.
Green : the product is active and your customers can see it.
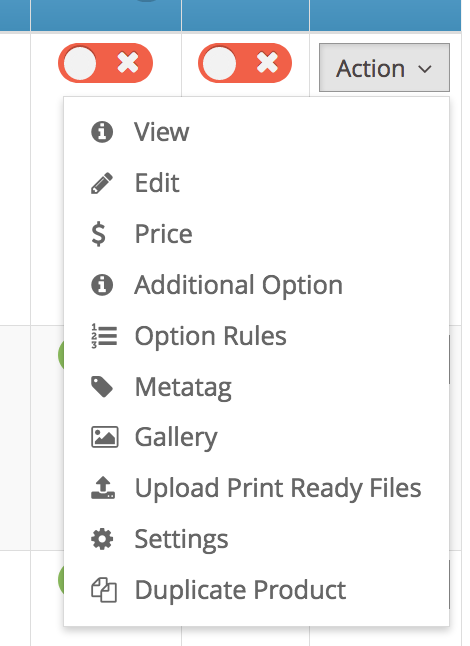
Action Button :
View : viewing the product summary
Edit : edit the products details, configuration & description
Product Size : edit the product size.
Price: manage the product qty & prices
Additional Options : add / manage the products extras and options.
Option Rules : add / manage the products additional options rules.
Metatags : manage the products metatags for SEO
Gallery : add / edit the products images
Upload Press Ready File : Upload fixed artwork attached to the product
Settings : Manage the product settings.
What's Next :
Add an email signature (header & footer)
Step 1. Log in to your affiliate admin.
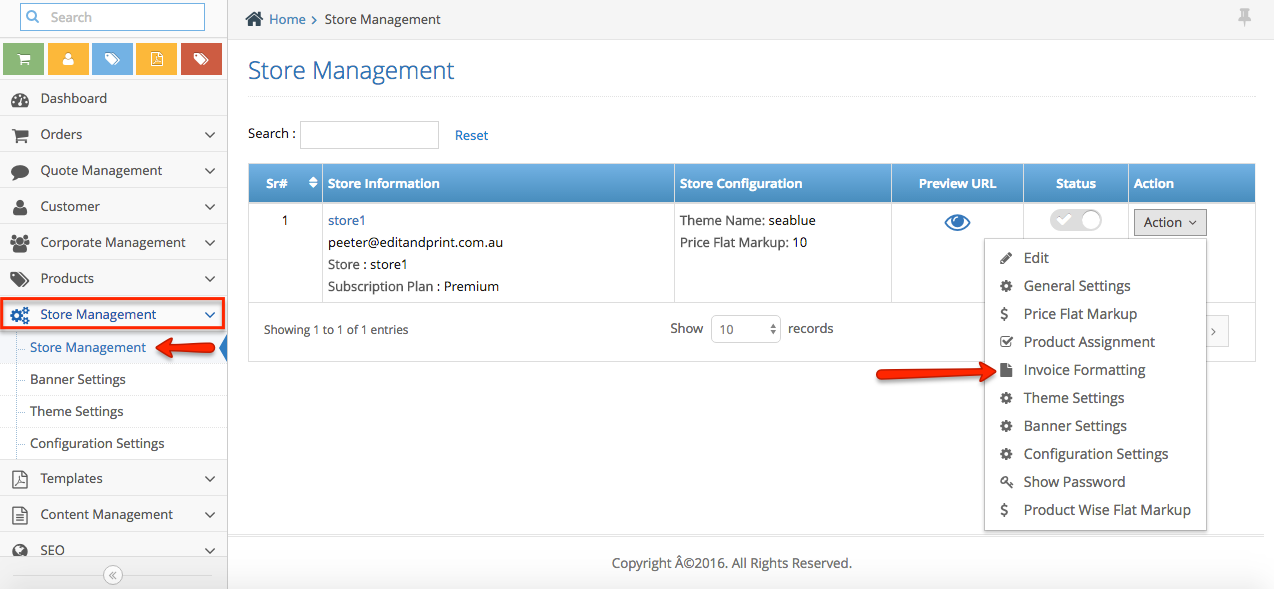
Step 2. Navigate to Store Management and click Store Management.
Step 3. You should see your store. Click Action and select Invoice Formatting.
Step 4. Enter your invoice header and footer on the field.
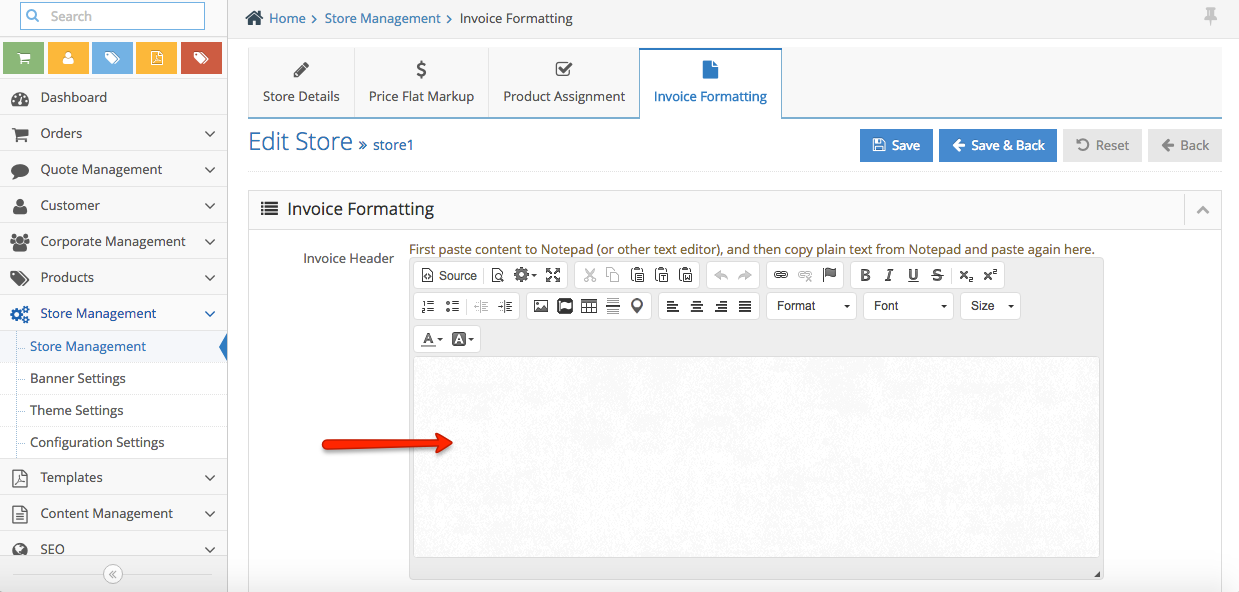
Note: In most cases, the invoice header and footer is based on image. Here’s how you can upload an image:
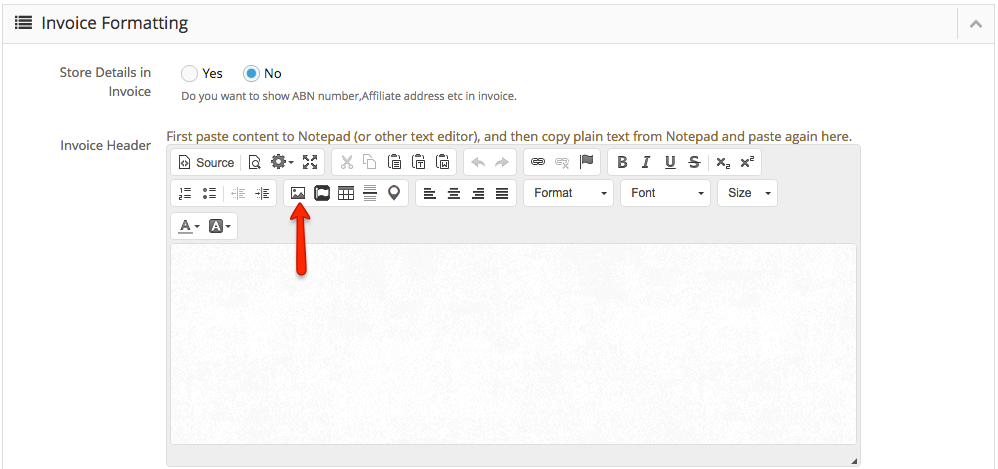
a) On the editor, click the image icon.
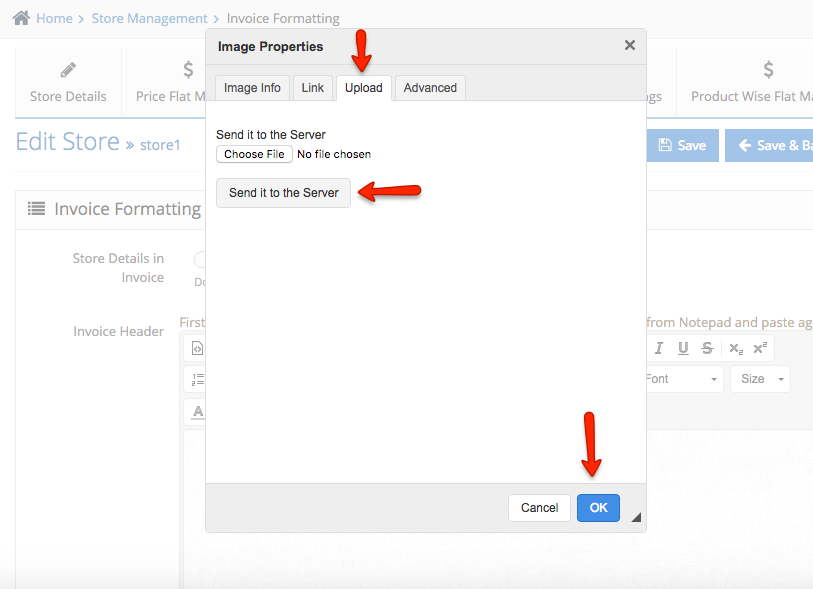
b) Another window will pop up and this will allow you to upload the image. Click Upload tab. Click “Choose File” button to select the image header and click “Send it to the Server” button. Then click OK.
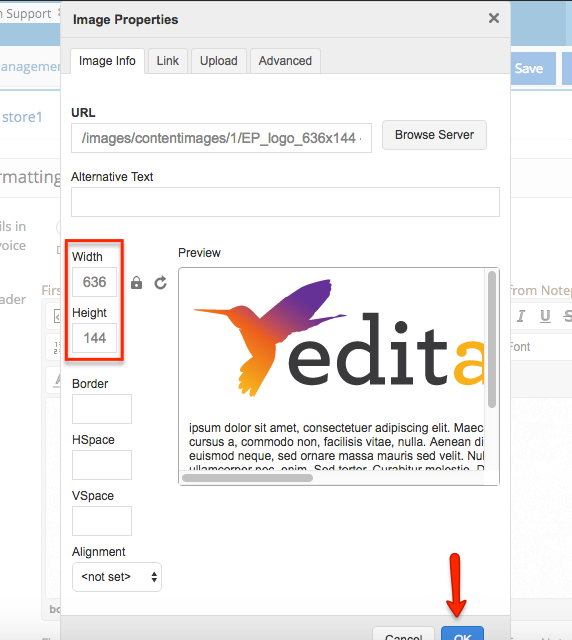
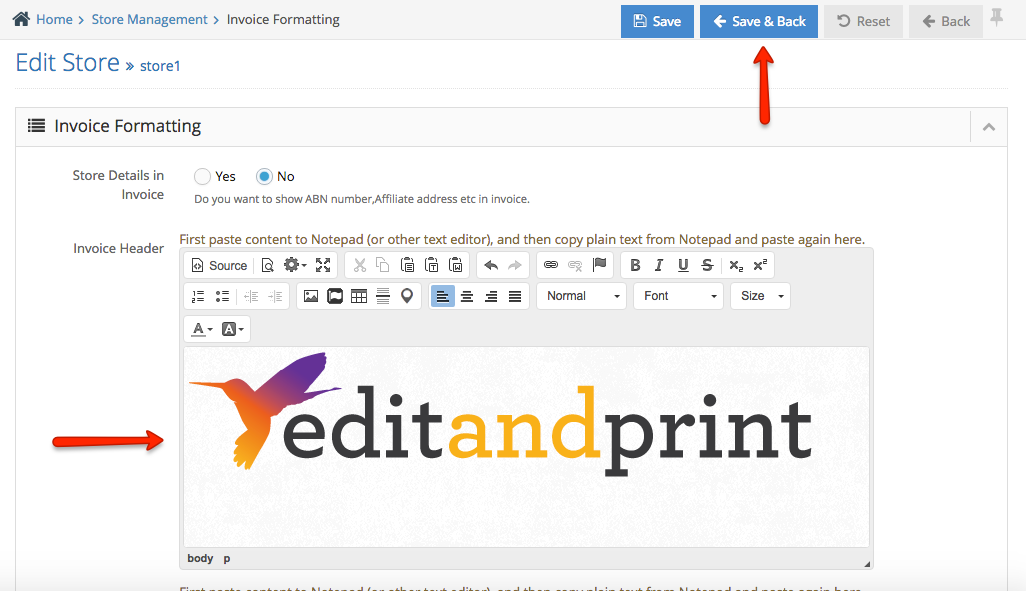
c) You have your invoice header added. Please do the same thing for footer. After that, click Save & Back button.
